|
Navigate & Edit Tab |
  
|
| Show/Hide Hidden Text |
|
Navigate & Edit Tab |
|
| Show/Hide Hidden Text |
Description of all the groups available under Navigate & Edit tab is described below.
 |
| Click on image to magnify/shrink |
Page Navigation Group:
1. First Page: This option is used to go to the first page of the current document.
2. Previous Page: This option is used to go to the previous page from the current page of the document.
3. Next Page: This option is used to go to the next page from the current page of the document.
4. Last Page: This option is used to go to the last page of the current document.
Action Group:
1. Split: This option is used to split a TIFF or PDF file into two separate files. The new file will be created from the next page of the current page being displayed and will contain all the subsequent pages. You are allowed to split multiple page documents even after applying grouping.
2. Copy Link: This option will allow you to to copy the URL of the current window. Main purpose of this option is to facilitate you to copy the URL and save it at your desired location. Thereafter, in future if you wish to add the document for the same record then you can just paste that particular URL in the browser and add the documents without opening the Host Application.
3. Add Pages From Scanner: This option is used to add pages from the scanner to the current TIFF or PDF file.
4. Add Pages From File: This option is used to add pages from a file to the current TIFF or PDF file.
5. Replace Content: This option allows you to replace the content of the selected document by replacing the document with other document of same mime type. Clicking Replace Content button will open Windows Explorer form, asking you to select the file that you would like to replace with the existing file. Select the file from the desired location, click Open and you should see the document gets replaced with the one you selected.
Note: |
Replace Content will only replace the content of the document of the same mime type and Workflow Item details will remain the same. |
If the document that you are trying to replace has Annotations added within that document then you should see following message prompt asking you - "Are you sure you want to remove Annotations?". Clicking on Yes button, will not add those Annotations in the new document that you are about to replace. Clicking on No button will keep those Annotations in the new document that you are about to replace.

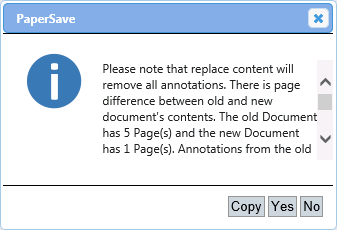
If there is a page difference between the old and new documents content, then you should see the following message displaying the related information and asking you - "Are you sure you want to remove Annotations?". The message box also shows you the page difference between the old and new documents content. Clicking on Yes button will NOT add those Annotations in the new document that you are about to replace. Clicking on No button will keep those Annotations in the new document that you are about to replace.
Note: |
Please take a note that Annotations will be carry forwarded to the new document based on the page # on which it exists. Incase the new document that you are about to replace has less no. of pages than the old document, then the Annotations will be removed from those pages that do not exists in the new document. |
Annotations Group:
Note: |
||||
|
1. Add/Edit Annotations: This option allows you to enable the Annotations Options.
Note: |
||||||
|
2. Select Annotation: This option is used to select annotations that are already present on the current document.
3. Show/Hide Annotations: This option is used to show/hide all the annotations on the current document.
4. Stamp: This option is used to place a stamp on the current document. Selecting this option and clicking on the desired location on the document where you want to add the stamp will display the Edit Stamp annotation dialog box. Here, you can select the predefined stamps or create a new stamp.
5. Note: This option is used to add a sticky note to the current document. Select this option and click on the desired location on the document where you want to add a Note and the Add Sticky Note annotation dialog box will be displayed. Here, you can select the icon from the list and add the note in the Contents box.
6. Pen: This option is used to write on the current document as if you are using a pen.
7. Ellipse: This option is used to draw an ellipse on the current document.
8. Line: This option is used to draw a line on the current document.
9. Polygon: This option is used to draw a polygon on the current document.
10. Rectangle: This option is used to draw a rectangle on the current document.
11. Arrow Line: This option is used to draw an arrow line on the current document.
12. Highlight: This option is used to highlight a certain area of the current document.
13. Redaction: This is a simple rectangle annotation that receives special treatment when you save the document, this annotation is permanent. No person can remove or move this annotation once the document is saved.
Note: |
Only those users can add Redaction Annotation, for whom the permission is defined from PaperSave Settings. |