View Gift records pending commit
The "View Gift records pending commit" feature allows you to associate such PaperSave documents with Gift records in Raiser’s Edge, which were not associated when the batch was committed.
How do batch records get within the “View Gift records pending commit” option?
Batch gift records will move within the View Gift records pending commit option when an unexpected error occurs while moving the PaperSave document(s) to the target committed gift record or when your PaperSave is disabled within the PaperSave Options window during a batch commit operation
How to use the "View Gift records pending commit" feature in Blackbaud Raiser’s Edge application?
1) Log in to the Blackbaud Raiser’s Edge application.
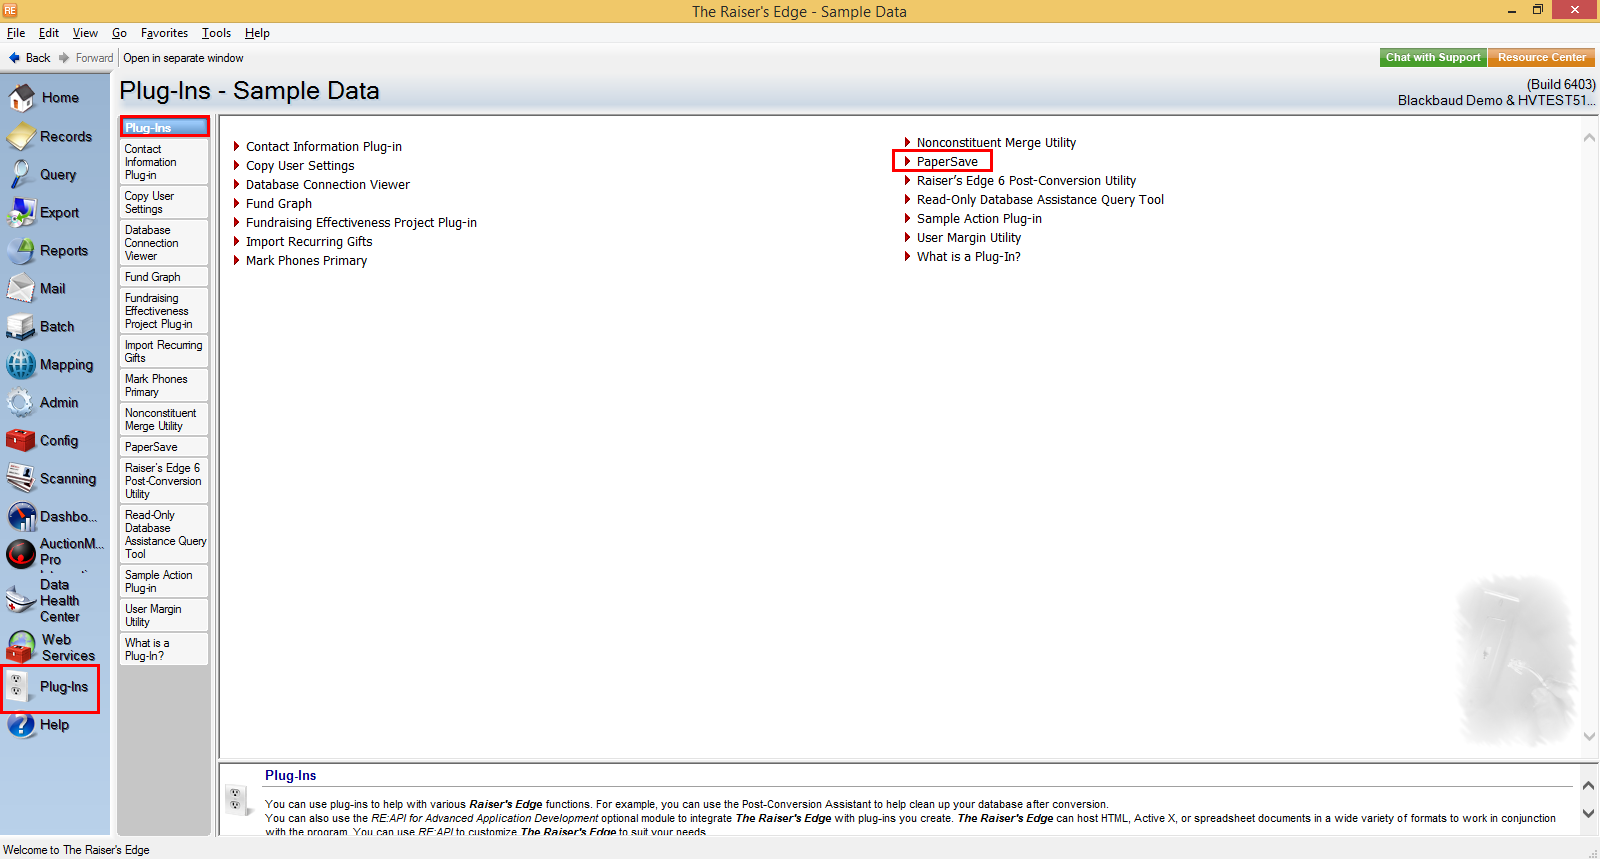
2) Click on the Plug-Ins option in Raiser’s Edge bar and select PaperSave as shown in the below screen.
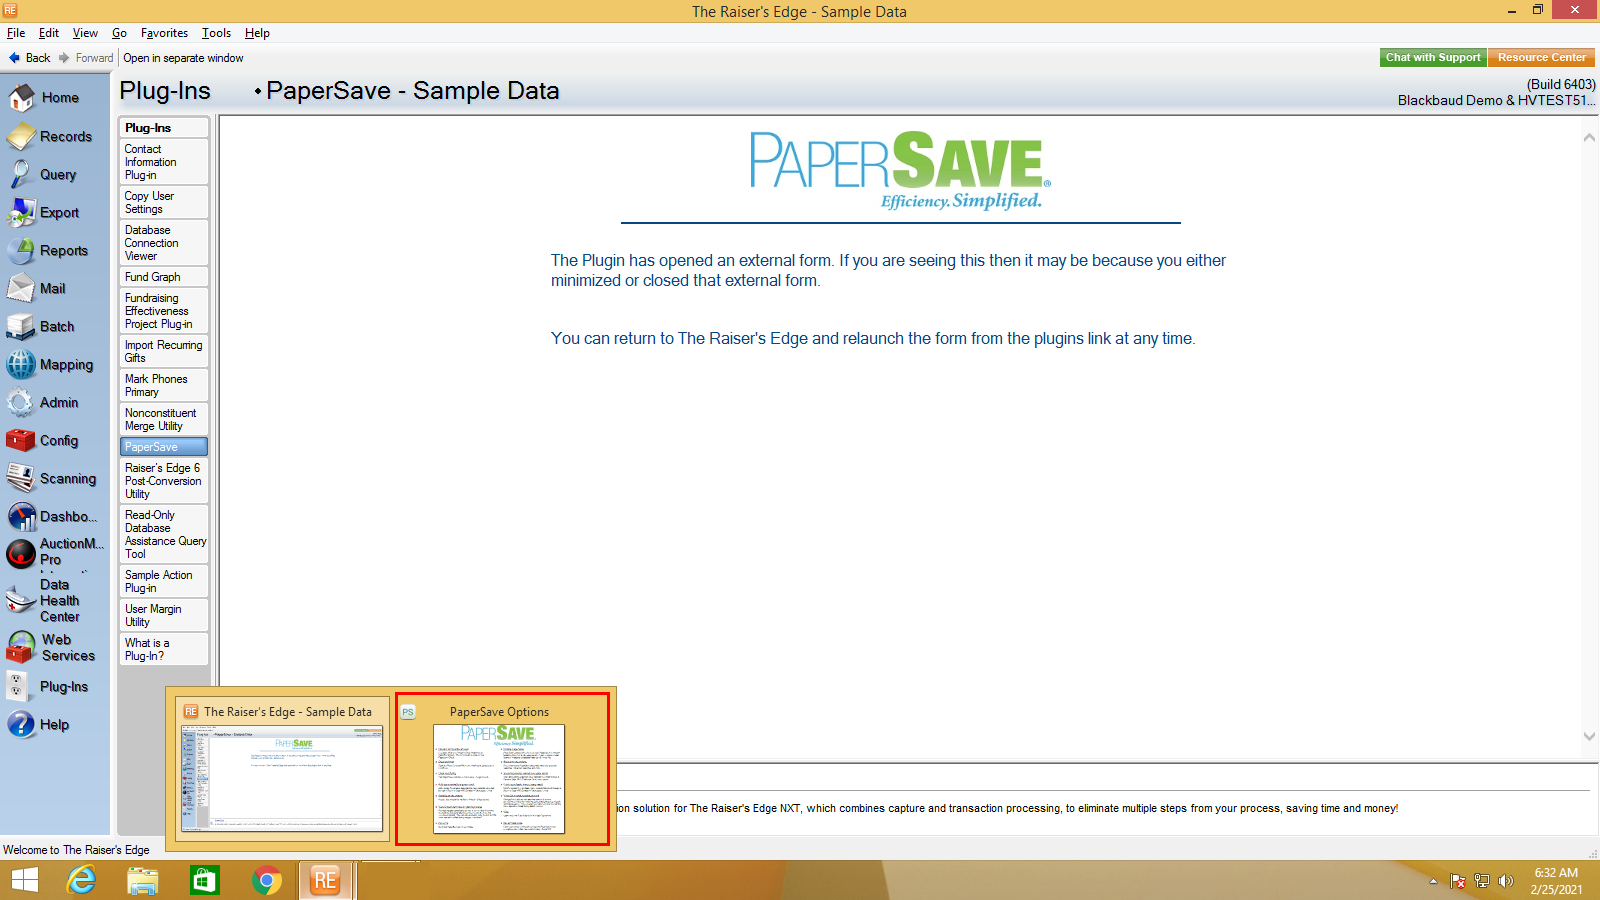
3) Once you click on PaperSave, it opens the PaperSave Option Window, which is automatically minimized. You can hover on the Raiser Edge application icon on the taskbar and select “PaperSave Options” to maximize the window, as shown in the below screen.
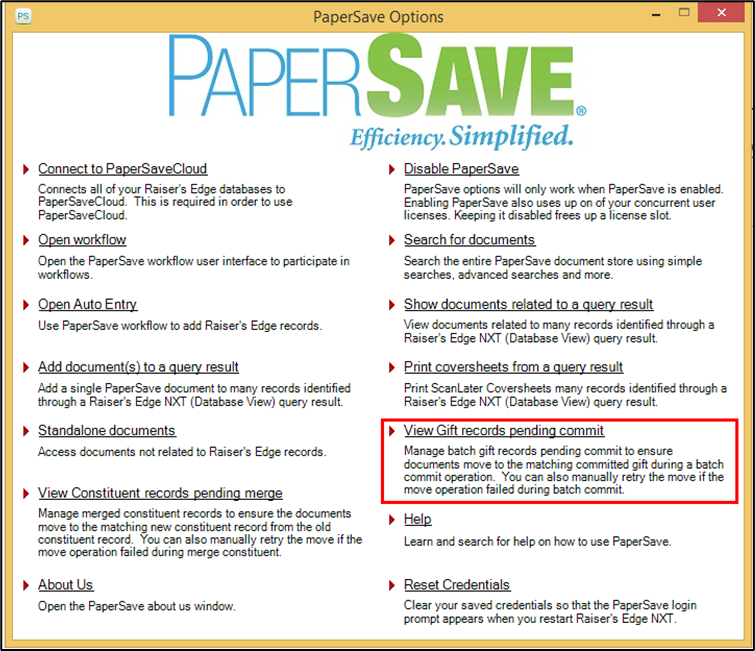
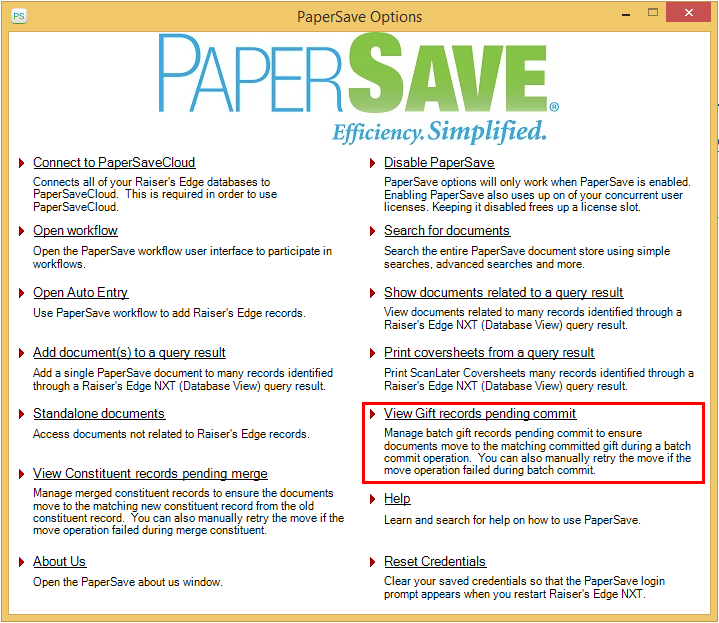
4) Click on the View Gift records pending commit option from the PaperSave Options window.
Note: You must first enable PaperSave using your PaperSave credentials to enable all the related options in the PaperSave Options window.
5) Now, you will see a list of the batch records whose batches were committed successfully in Raiser’s Edge, but the PaperSave document(s) were not moved to the committed gift record.
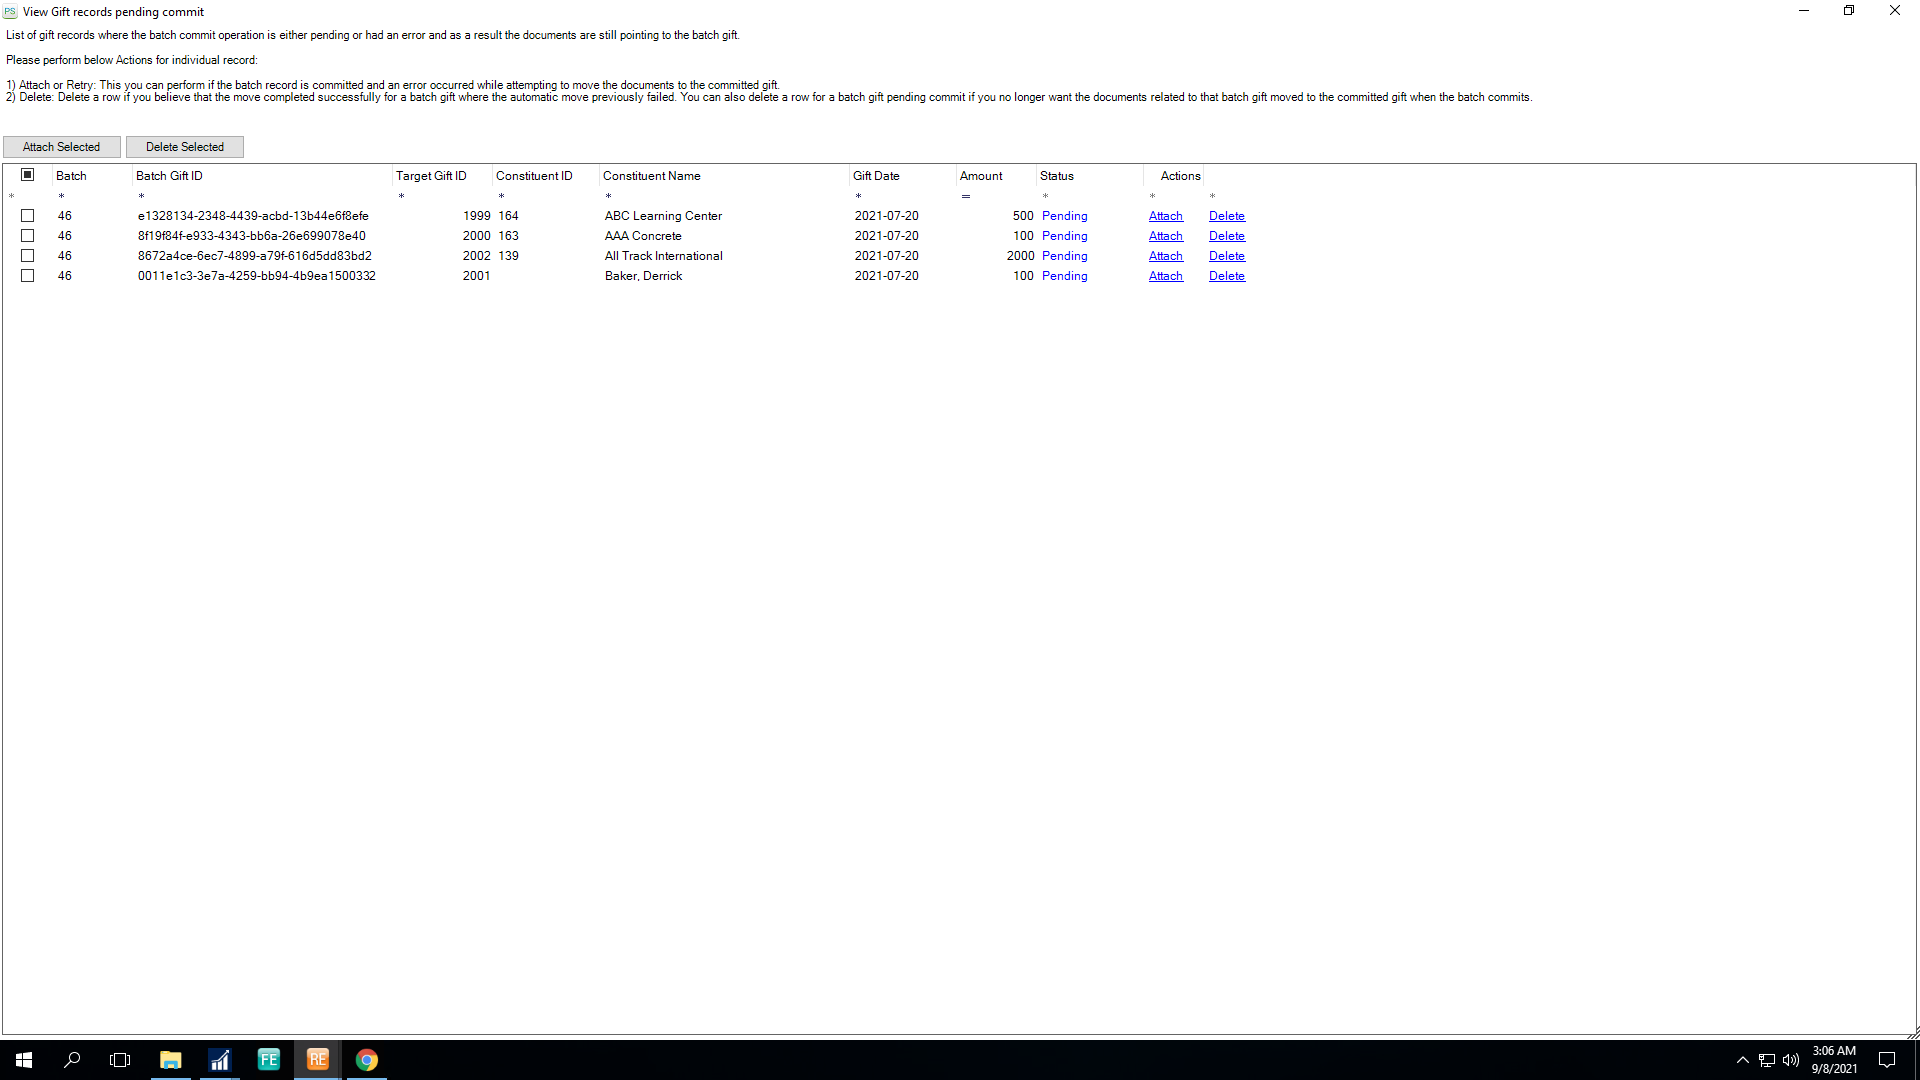
6) To resolve the desired document association from the list, click on the Attach link from the Action column as shown in the below screen.

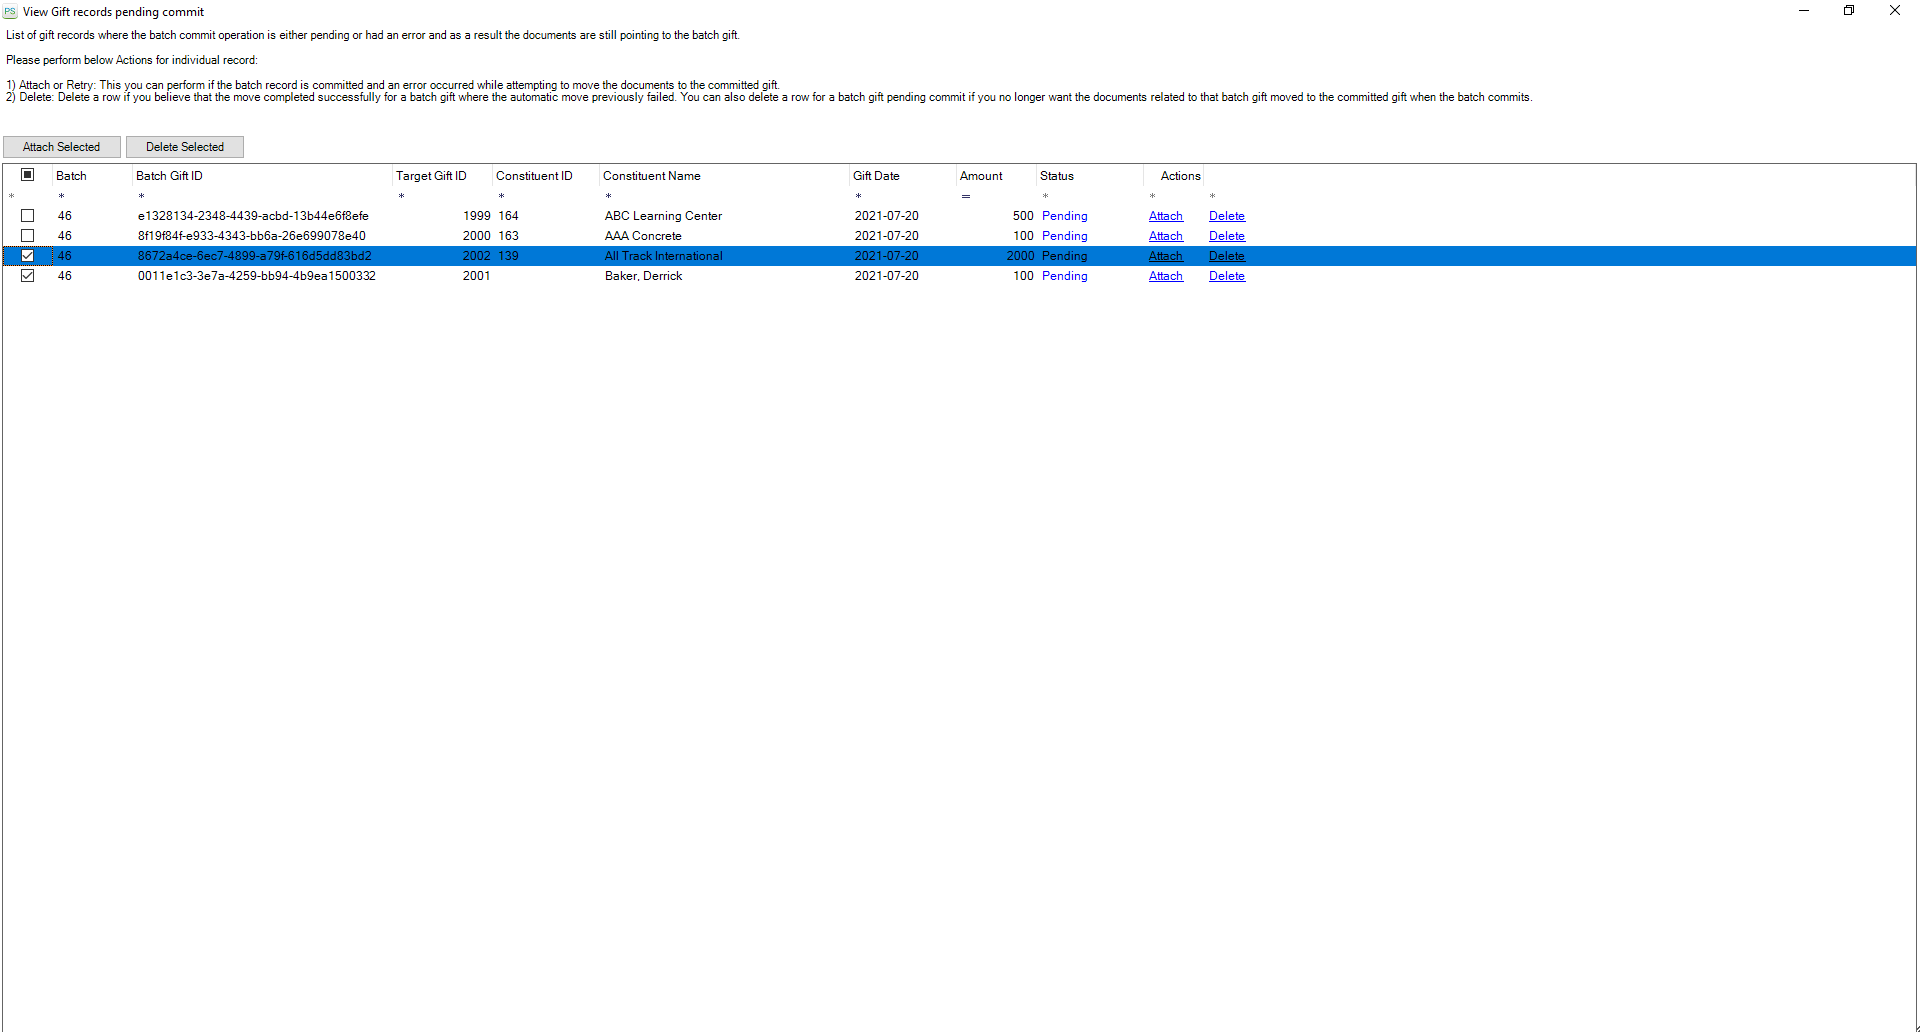
- To associate multiple PaperSave documents, you can select one or more records using the checkboxes and click on the Attach Selected button as shown in the below screen.
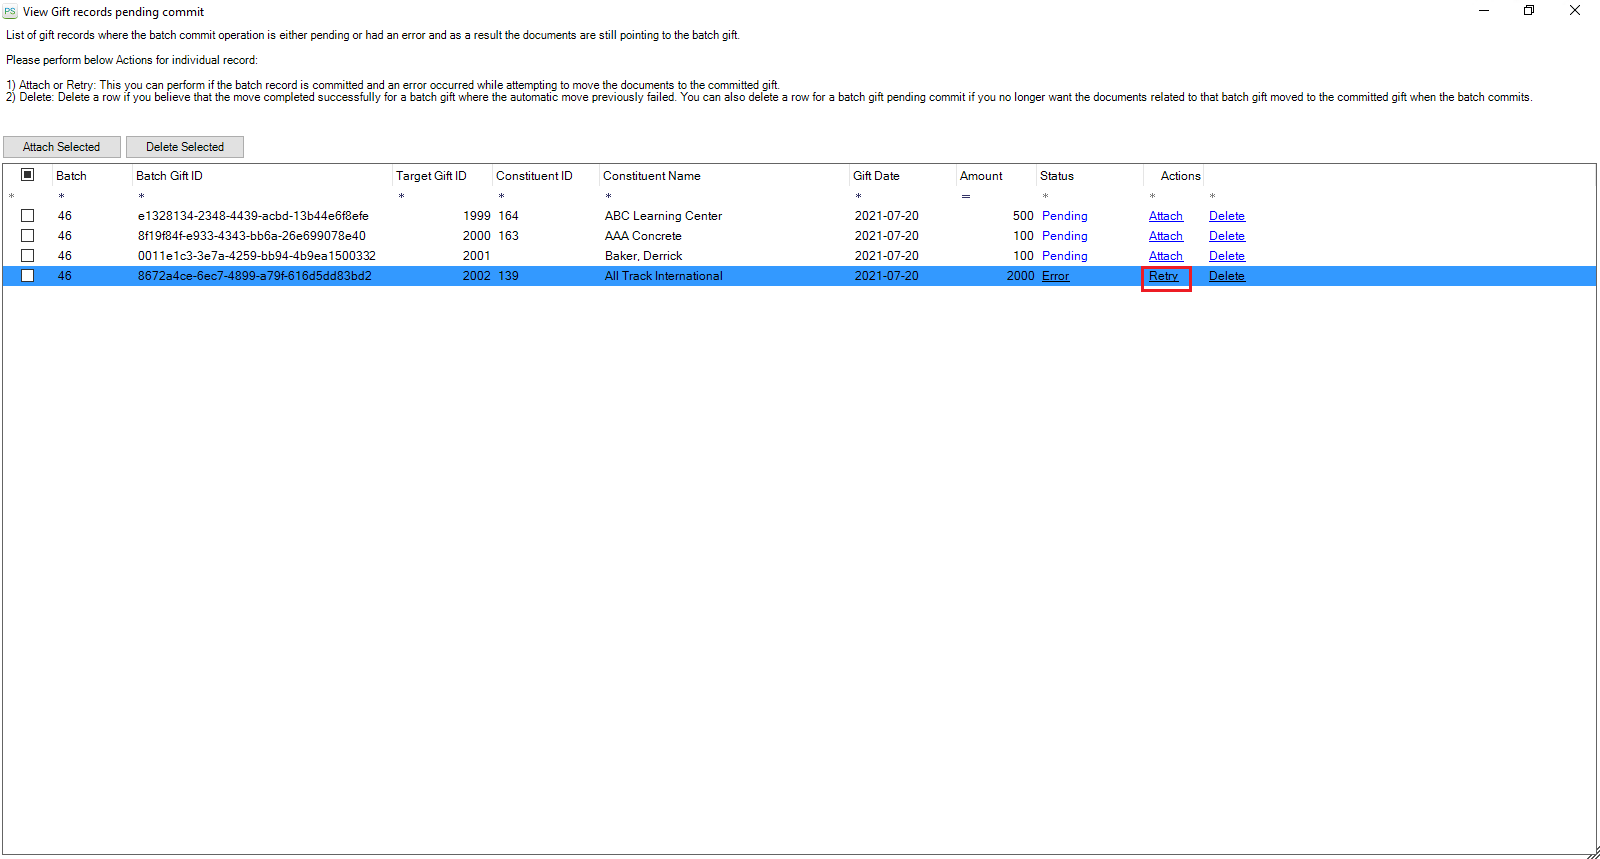
- If you get an unexpected error while attaching the PaperSave document(s), you will see the Action column's Retry link as shown in the below screen. You can click on the Retry to attach the PaperSave document to the committed gift record.
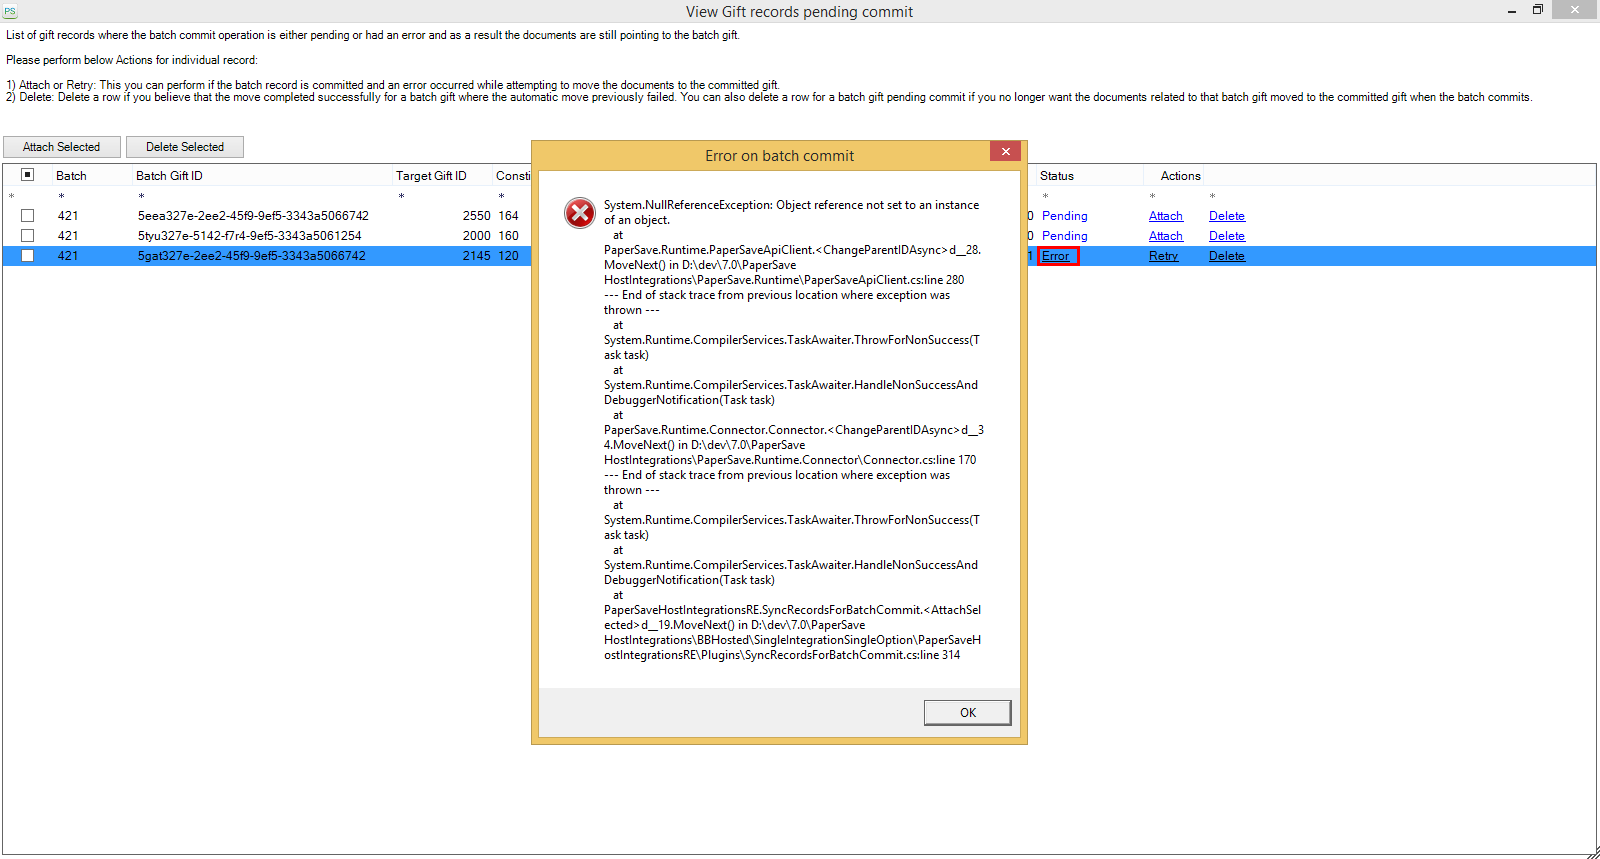
- You can click on the Error link to view the error details as shown in the below screen.
Tip: If there are numerous batch records in the list, you can sort the list by clicking on the column header or use the column filters to get the desired batch record from the list.
7) Once you click on the Attach link, a confirmation message is prompted to show that the document is successfully moved to the committed gift record.

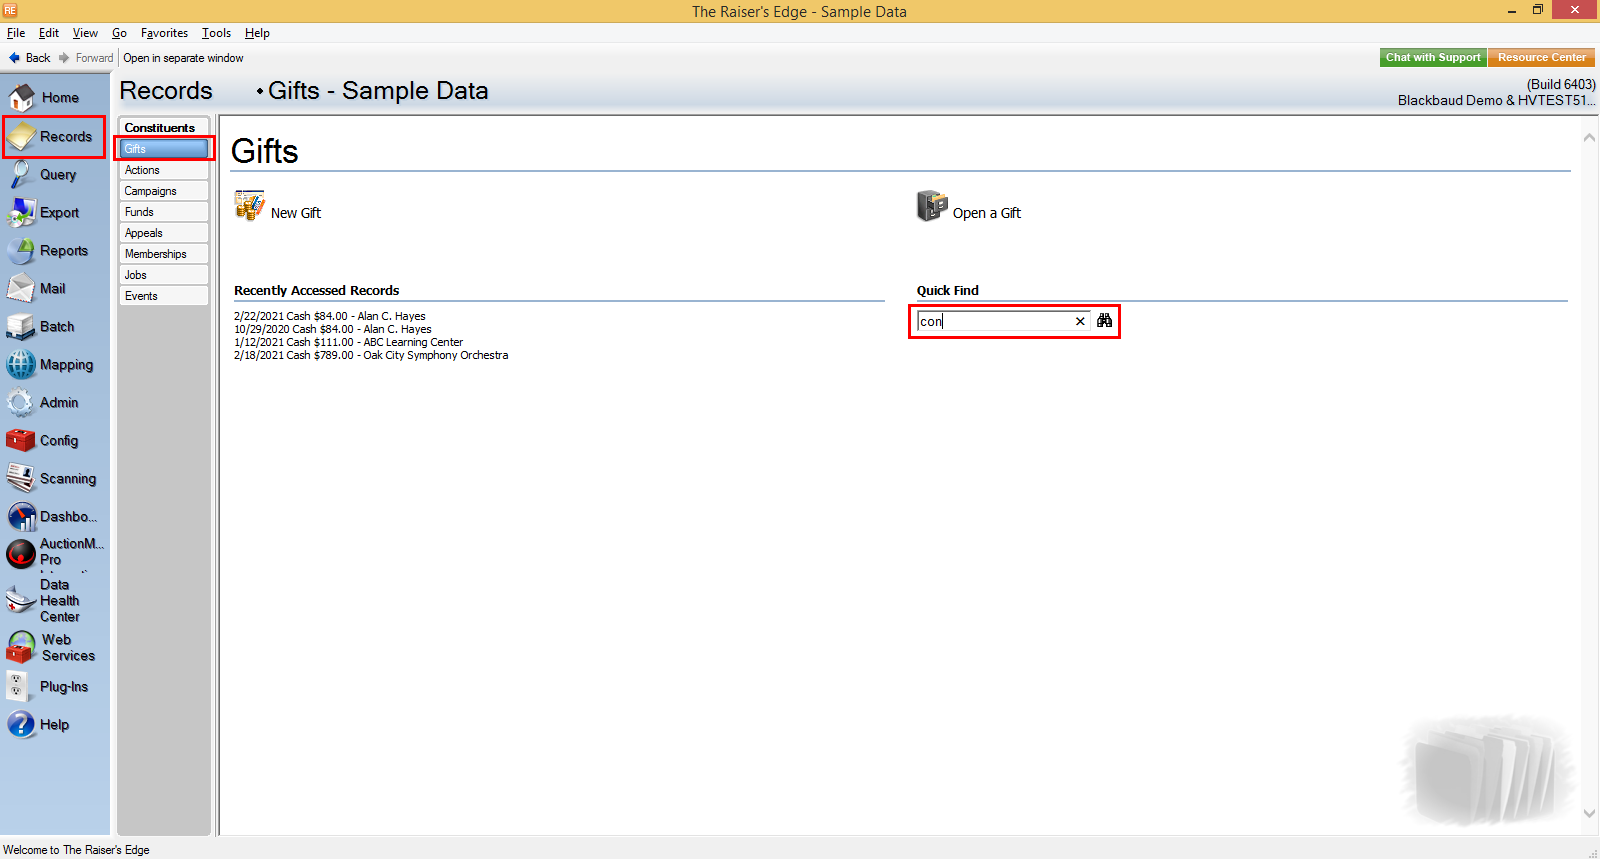
8) Now, go to Records in Raiser’s Edge bar, select Gifts, and enter the committed gift's constituent name in the Quick Find option.
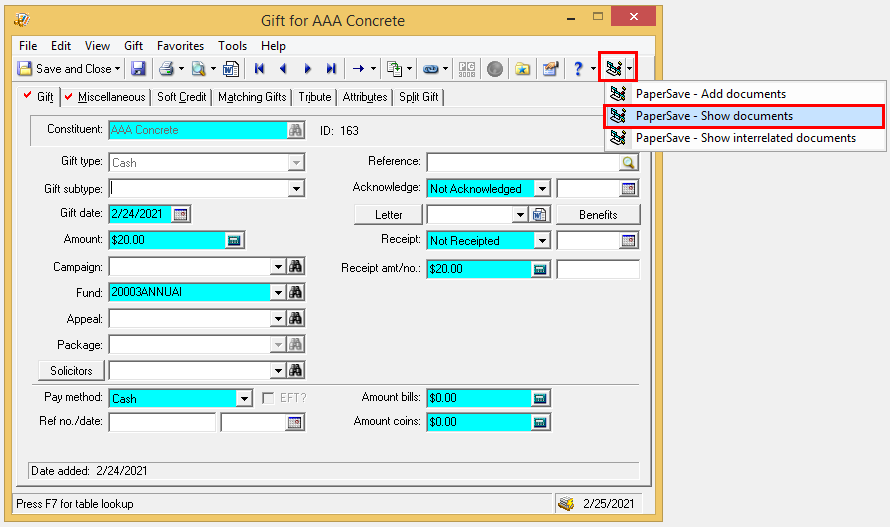
9) Select the target gift record from the result list, click on the PaperSave option, and select “Show documents” to view the PaperSave documents that were successfully associated with the committed gift.
Delete the batch records from the list
Follow the below steps to remove such batch records from the pending commit list whose document(s) were moved successfully to the target committed gift record but are still displayed in the pending list, or if you have no desire to move the PaperSave document(s) to the committed gift record.
1) Click on the Plug-Ins option in Raiser’s Edge bar and select PaperSave as shown in the below screen.

2) Once you click on PaperSave, it opens the PaperSave Options window, which gets automatically minimized. You can hover on the Raiser’s Edge icon on the taskbar and select “PaperSave Options” to maximize the window, as shown in the below screen.

3) Click on the View Gift records pending commit option from the PaperSave Options window.
4) Now, you will see a list of batch records whose batches were committed successfully in Raiser’s Edge, but the PaperSave document(s) were not moved to the committed gift record.
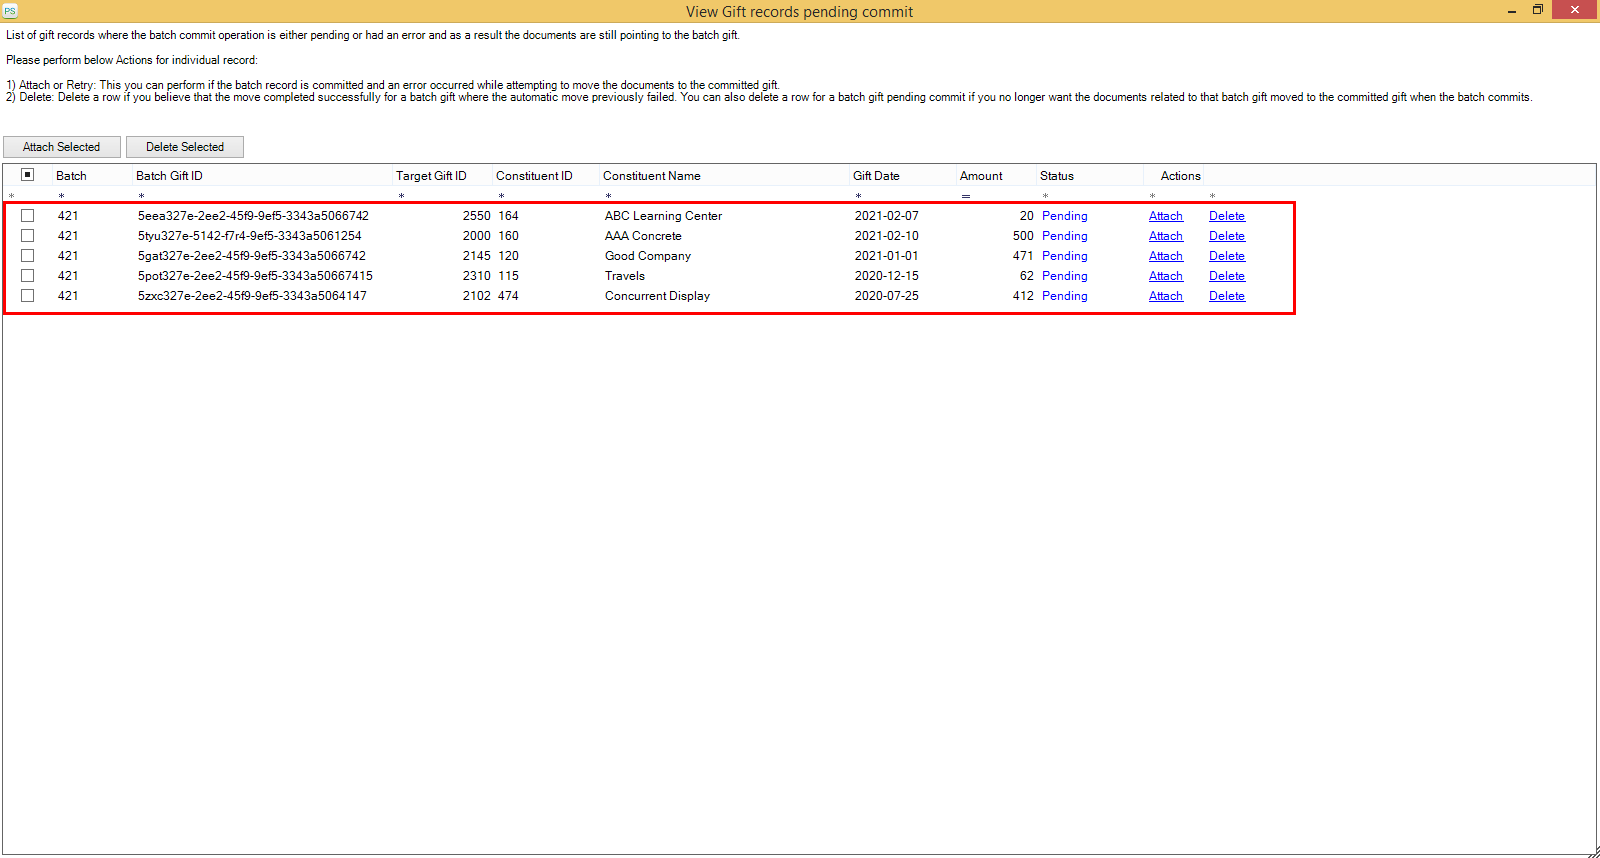
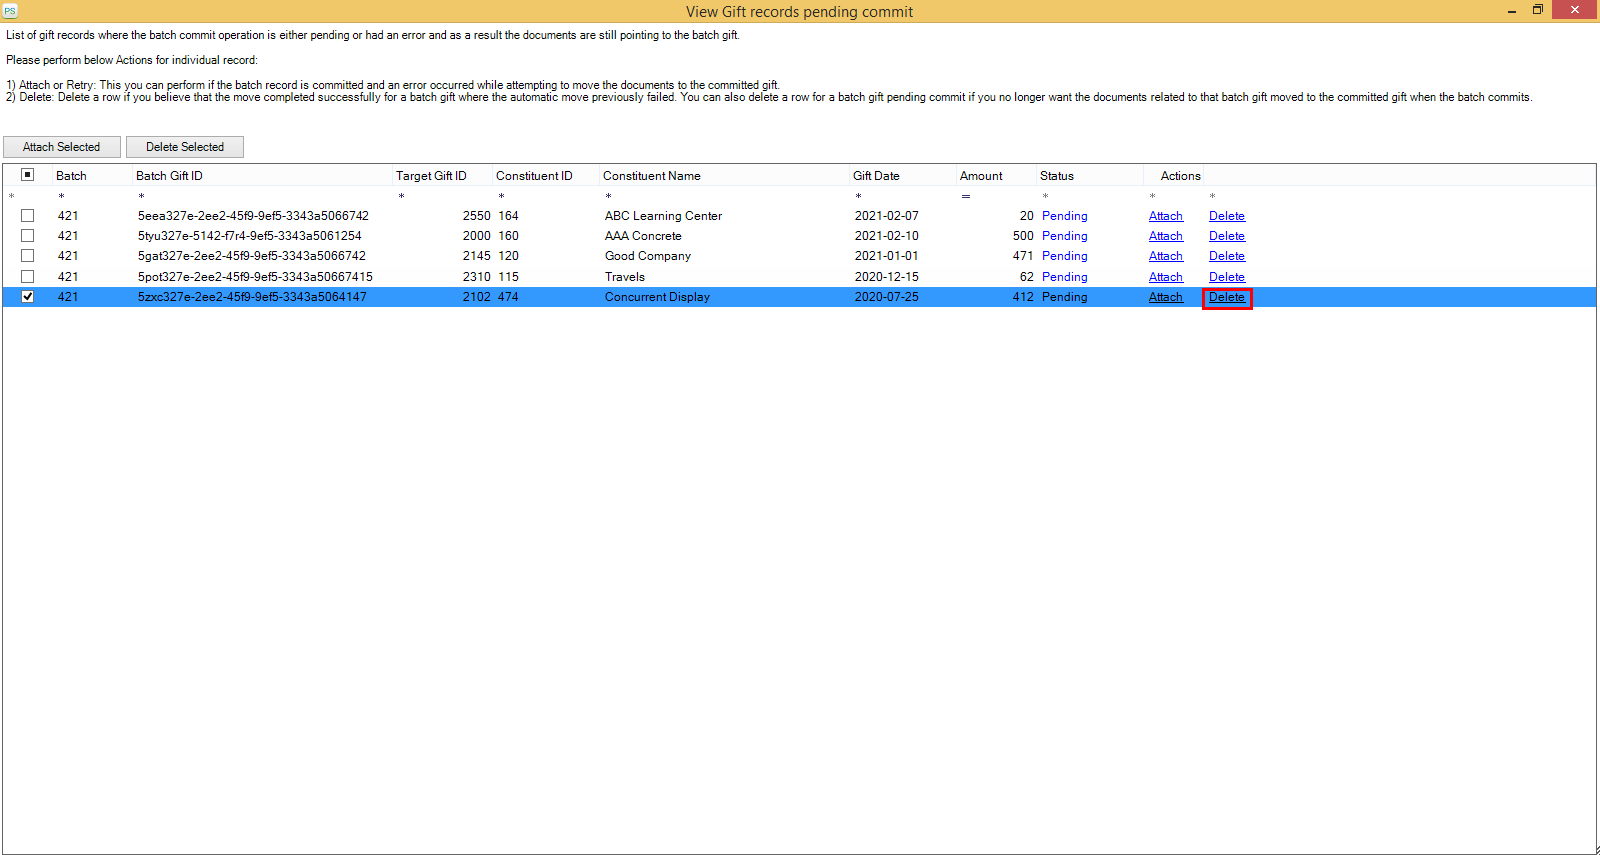
5) To remove the desired batch record from the list, click on the Delete link from the Action column as shown in the below screen.
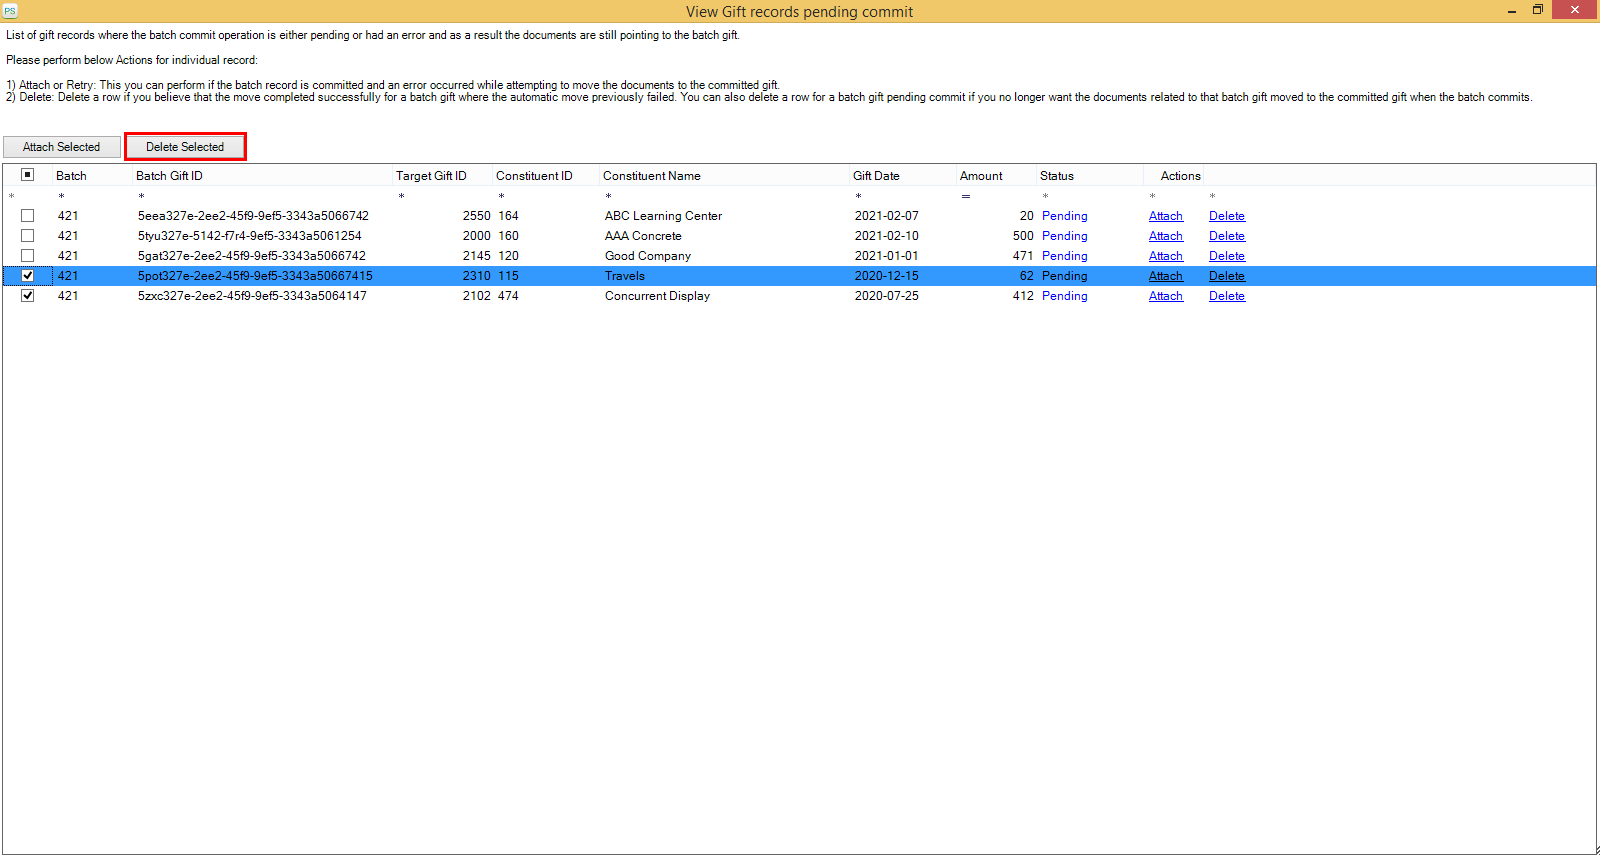
- To delete multiple batch gift records from the list, you can select one or more records using the checkboxes and click on the Delete Selected button as shown in the below screen.
Tip: If there are numerous batch gift records in the list, you can sort the list by clicking on the column header or using the column filters to get the desired batch gift record from the list.
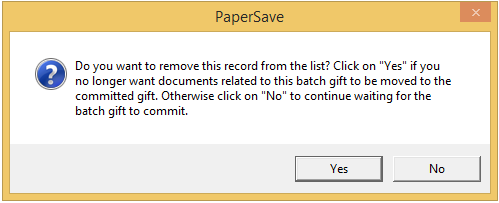
6) You will see a confirmation prompt as shown in the below screen. Click on Yes to proceed or No to cancel the delete operation.