Show documents from query
When you will select more than one records from the Raiser's Edge list view and click on Show Document, you will be redirected to Documents related to query window.
To view documents associated with the multiple Raiser's Edge record, you must follow the below steps:
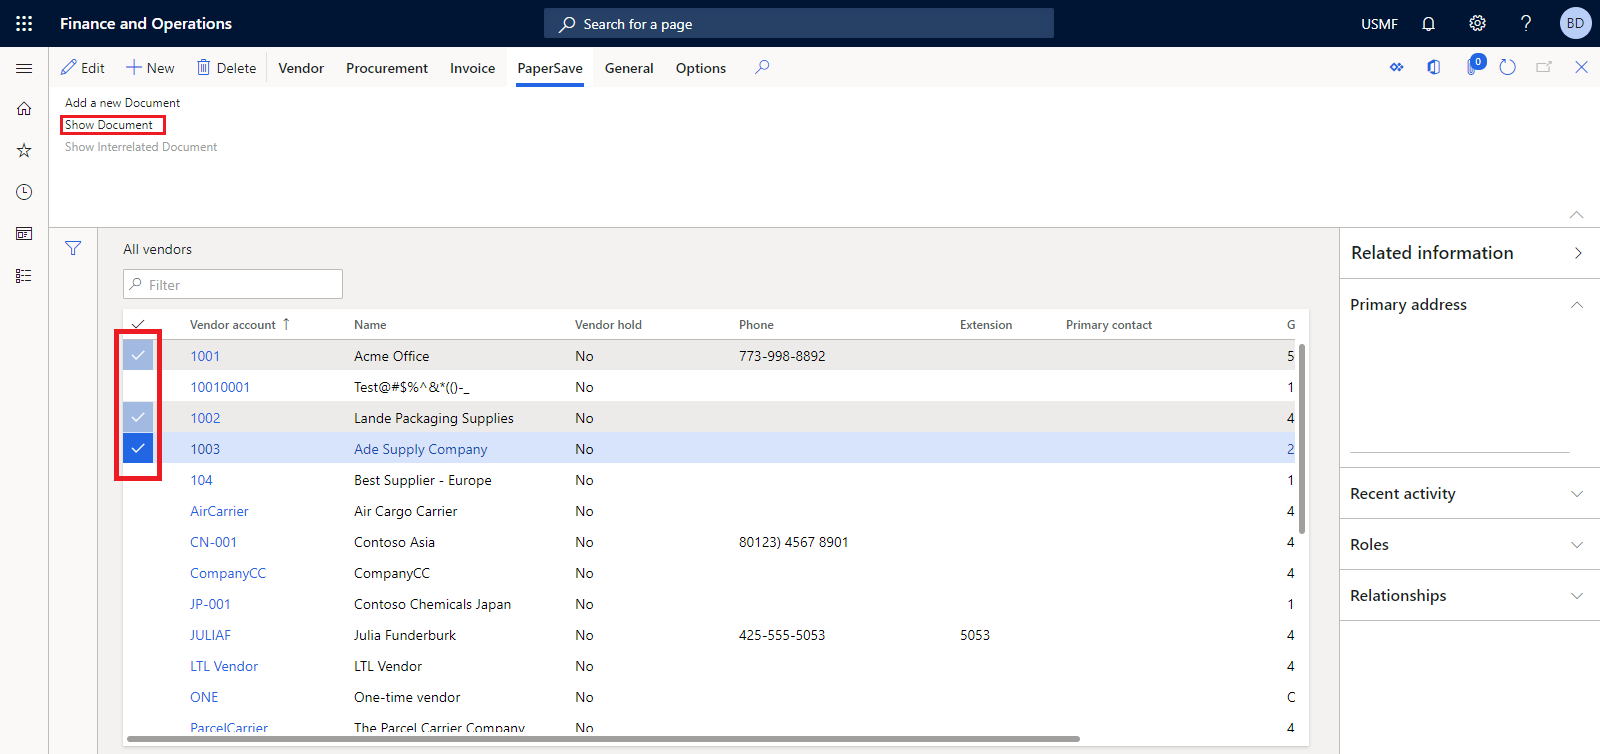
1) Select two or more records from the Raiser's Edge list view, and go to PaperSave option in action pane and click on Show Document option, as shown in the below screen.
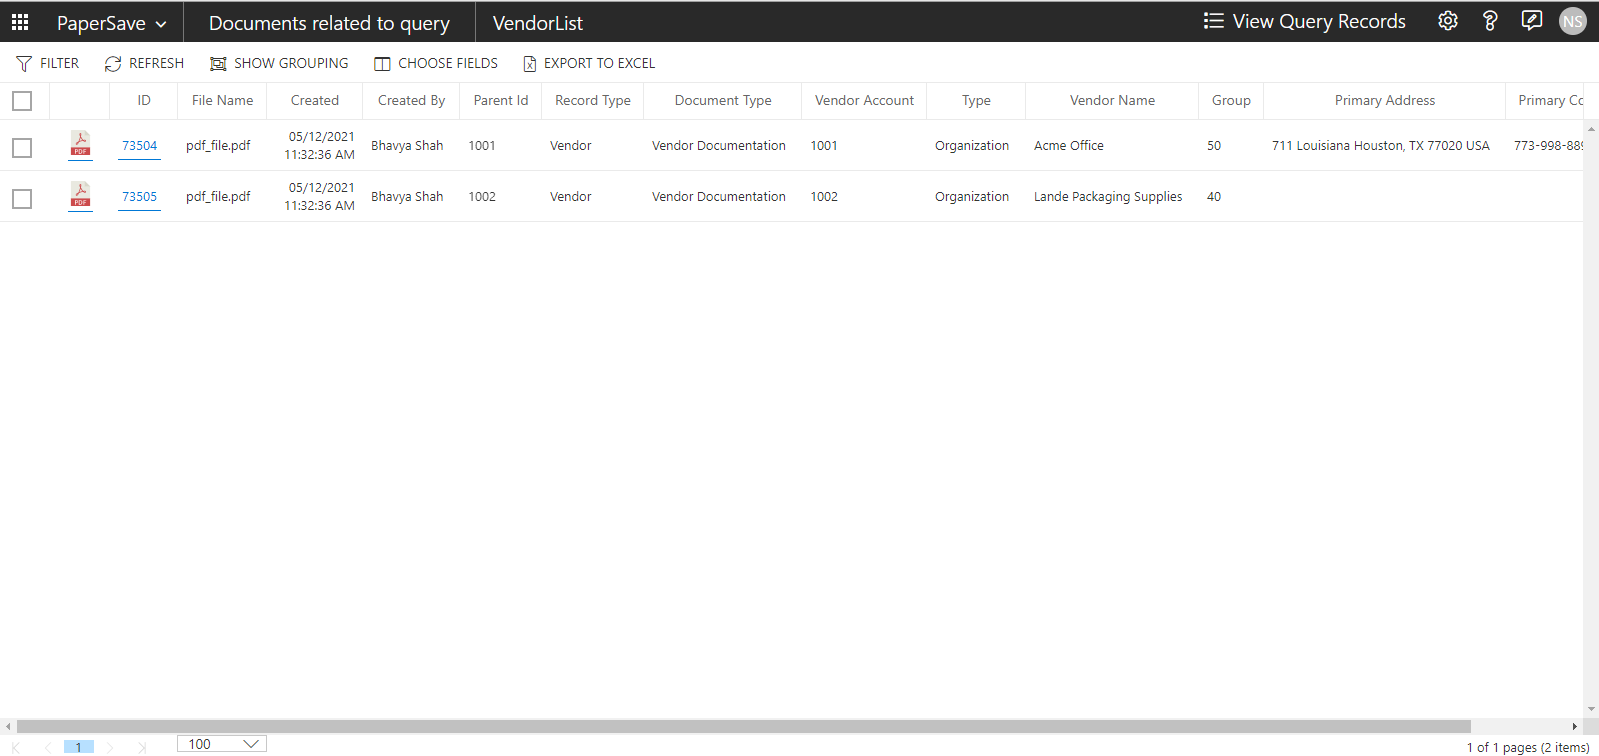
2) Now, it will open "Documents related to query" page, showing all the documents associated to the selected records, as shown in the below screen.
Note: If there is only one document within the selected Raiser's Edge record, then upon clicking on the Show Document, the document will directly open in an item viewer.
3) From "Documents related to query" page's application bar, you can navigate to different PaperSave Areas from PaperSave navigation menu, view the list of query records, and view/edit the document.
4) This page also contains the list toolbar with the following options:
- Filter: This option allows you to narrow down the items in the list by applying filter conditions. Learn more about Filter.
- Refresh: This option updates the recent changes in the show document list
- Show Grouping: This option helps you to cluster the items in the list based on the desired header fields. Learn more about Show Grouping.
- Choose Fields: This option allows you to set desired preferences for the fields to be displayed in the current list using Choose Fields. Learn more about Choose Fields.
- Export to Excel: This option exports the current list of items to Microsoft Excel Sheet. Learn more about Export to Excel.
5) When you select the desired item from the list, a slide up panel will pop-up at the bottom of the screen, as shown below.
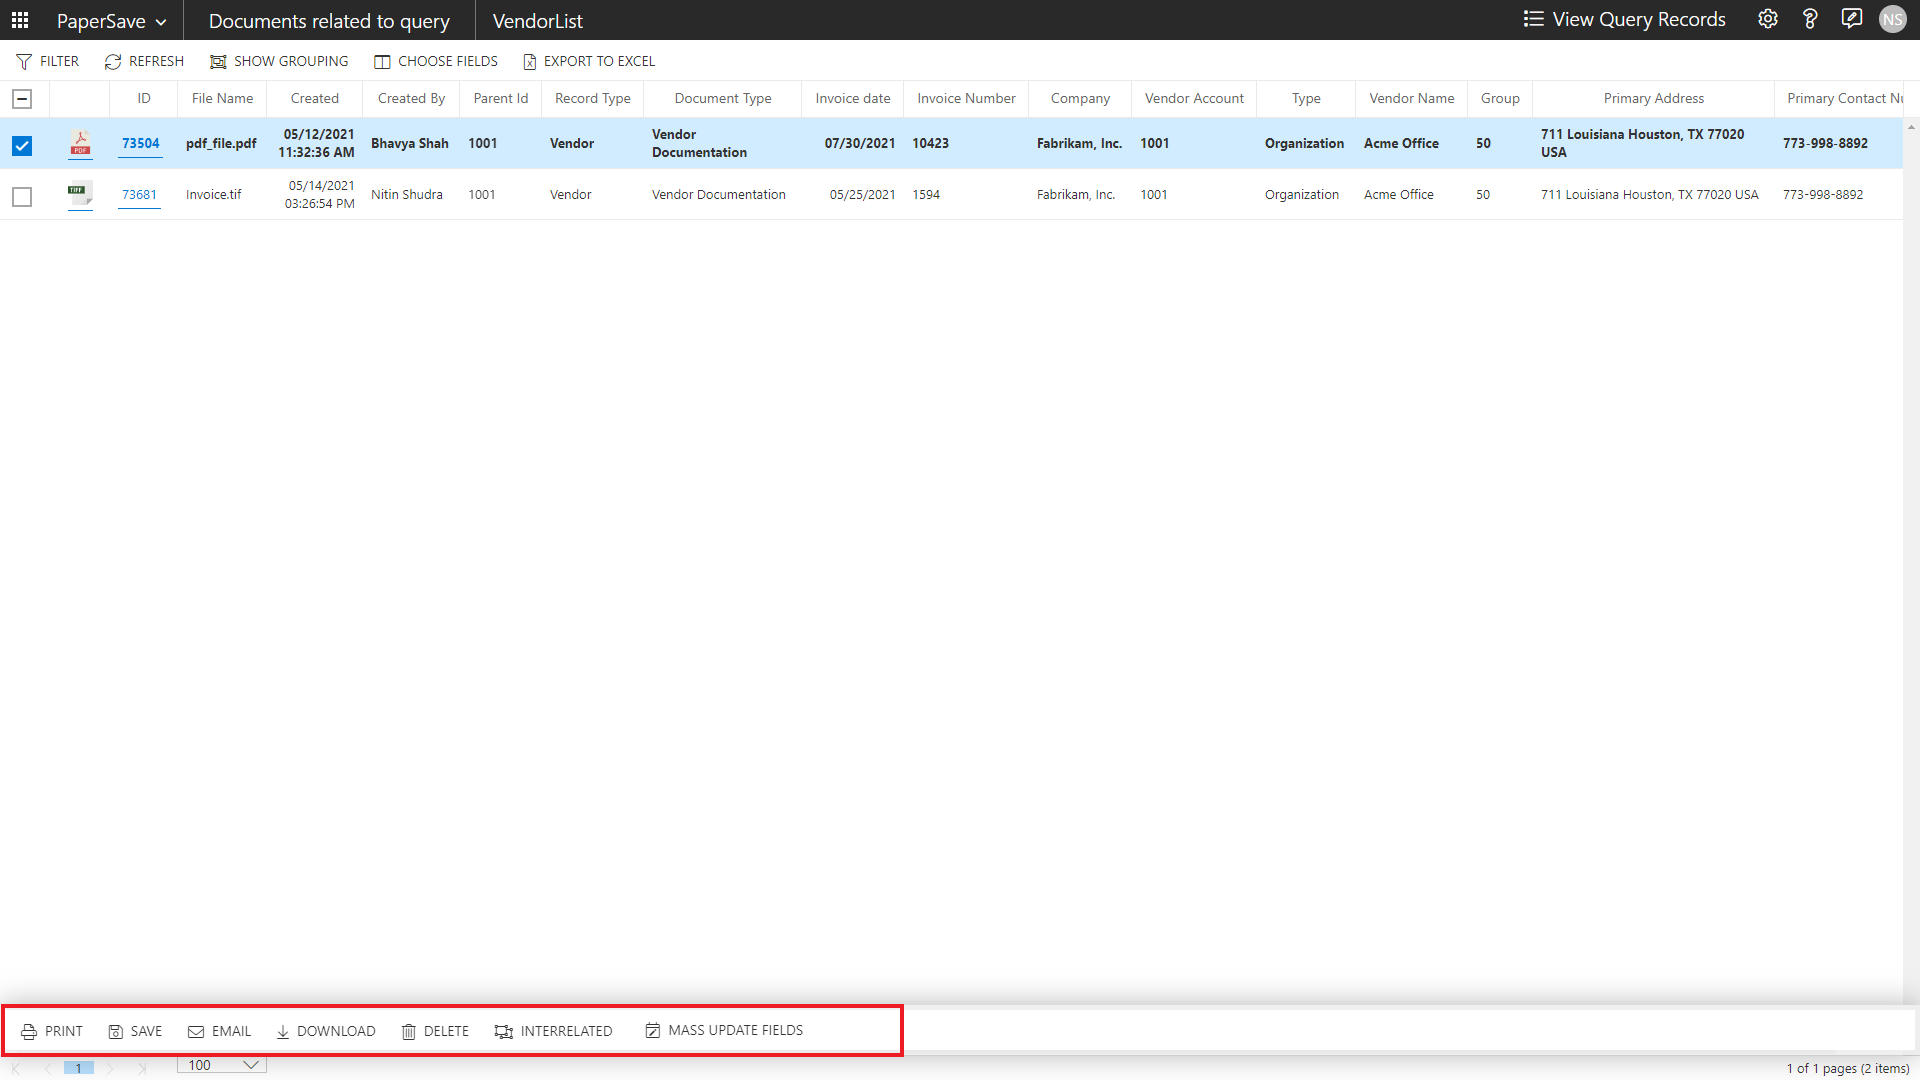
- The slide-up panel contains the following options:
- PRINT: This option enables you to print the selected item from the list.
Note:
1) Print option will be only allowed if a single item is selected. In case, multiple items are selected , then the Print button will be disabled.
2) This option also prints the annotations on the document, if any.- SAVE: The documentation for this functionality will be updated soon.
- EMAIL: The documentation for this functionality will be updated soon.
- DOWNLOAD: You can download the selected documents from the list. Learn more about the Download option.
- JOIN SELECTED ITEMS: You can merge two or more items of any image type (i.e. pdf, tiff, gif, jpg, bmp, etc.) from the list using join operation. This option will be enabled when you select two or more items of the same type that are in the same step. This option is based on the current user’s role & permissions as well as document type security. You can click on Join Selected Items option to learn its steps in detail.
- DELETE: You can permanently discard the unnecessary items from the current list using the Delete option.
Note: The Delete option will remain enable only if the current user has the rights to delete the item within the selected document type. These rights could be managed from the Document types in the Configuration Area.- INTERRELATED: This option allows you to view any documents that may be indirectly associated to the selected record. This option is dependent on the inter-relationships that have been configured in the Configuration module.
- MASS UPDATE FIELDS: This option is used to create templates to define values for the Document fields. Click on the Mass update fields option to choose the desired template from given list of templates.
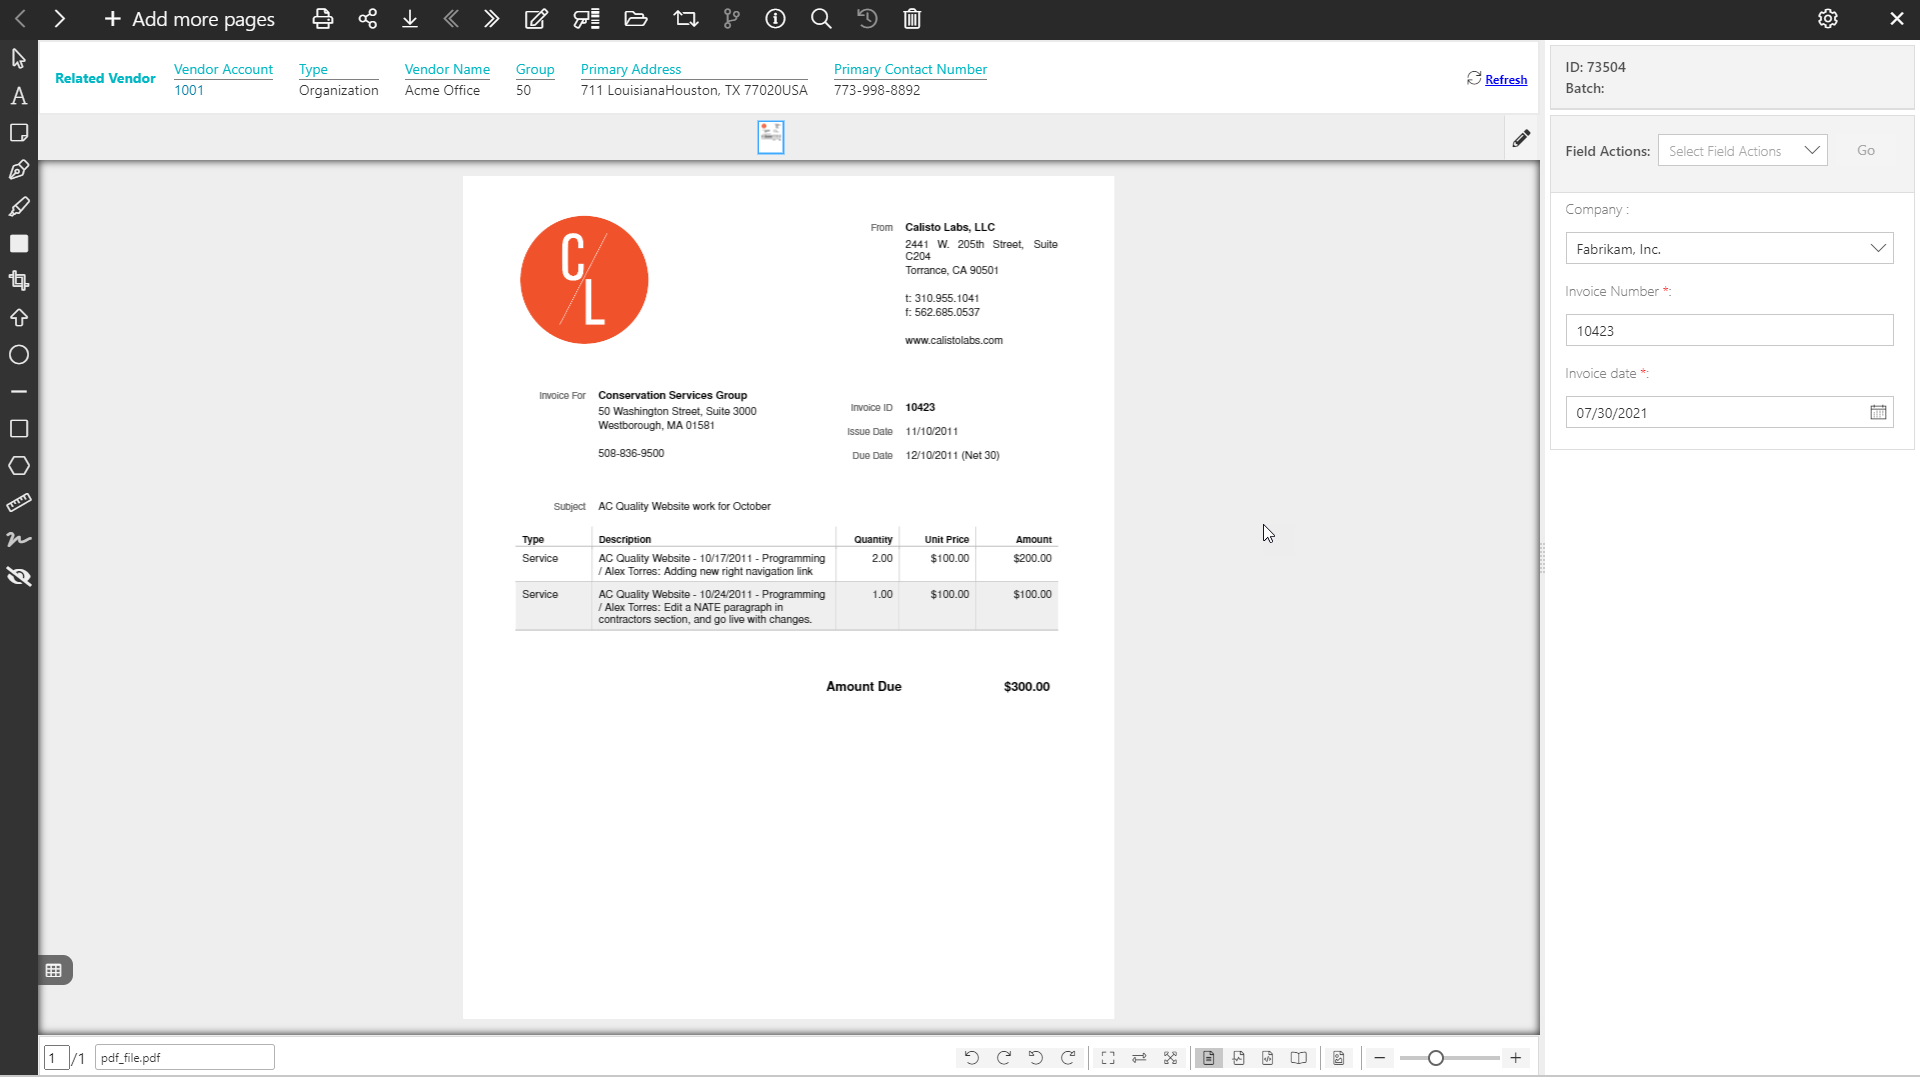
6) Click on the ID hyperlink or double-click on a row to open the document in the item viewer, validate the required values in the profile fields, apply annotations (if desired) and click on Save to update the document within the selected record.