|
Add An Outlook Email to PaperSave |
  
|
| Show/Hide Hidden Text |
|
Add An Outlook Email to PaperSave |
|
| Show/Hide Hidden Text |
Below are the steps for adding an Outlook Email to PaperSave:
1. Open Microsoft Outlook Application.
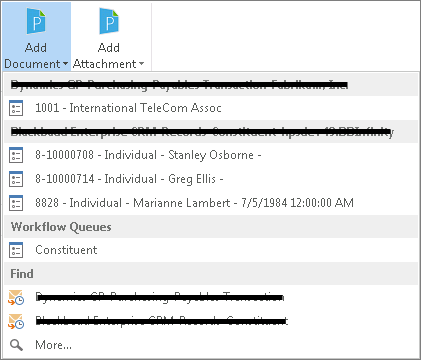
2. Under Home tab, you will be able to view Add Document and Add Attachment option. Open the e-mail with/without an attachment that needs to be added to PaperSave. Then click on Add Document button to add whole email with/without attachment.
3. Add Document option will expand as displayed in below screen. If you have already added some records, Drop Points/Workflow Queues, then its history will be displayed in the drop-down list. You can select More option to find a new record and add the e-mail.
Note: |
Last three Electronic Submission Drop Point types will be remembered under the history panel. |
4. As you will select More, Choose the Record to associate to window will open as displayed below. Now you need to select appropriate Transaction Type for the Host Application (here, Student Information System) from the left panel of the screen. Then click on Show all Records button in the ribbon to view all the records for the selected Transaction Type. Select the Record from the available list and click on Select button.
Note: |
You have the facility to add the e-mail directly to the Workflow from Choose the Record to associate to window by selecting the Drop Point/Workflow Queue whichever is applicable based on the Workflow Type. Click here to get more details on how to add attachment to create Workflow Item. |
 |
| Click on image to magnify/shrink |
5. Once you click Select, Add A New PaperSave Document for the selected Transaction Type window will open. You can select the Drop Point/Workflow Queue under Submit to Workflow group. Then click Save and Exit button to save the current attachments and exit the window. Or else click Save and New button to save the current document and continue adding new document to the same Transaction Type. You should see two tabs viz; Attachments and E-mail Header. Select Attachments tab as below and you would see the list of attachments that exists in the email. You can click on the respective attachment to view the file.
 |
| Click on image to magnify/shrink |
6. Click on E-mail Header tab to view the email details like From, Subject, Sent, To, CC and BCC.
 |
| Click on image to magnify/shrink |
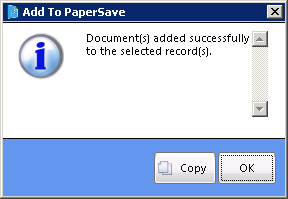
7. Once you save the document, below displayed confirmation message will open. Click OK to exit the window.
Note: |
Below confirmation message will be displayed on your screen only if Show Save Confirmation checkbox is checked under Options tab of Add a New PaperSave Document window. |