|
Import Configurations |
  
|
| Show/Hide Hidden Text |
|
Import Configurations |
|
| Show/Hide Hidden Text |
To import the PaperSave Configurations follow the steps below:
1. Click Configuration Import/Export under the Utilities Section of PaperSave Settings. PaperSave Configuration Import/Export Utility window will open as displayed below. Select Import tab. You should be able to view PaperSave Application Server URL in the status bar of the window. However, if you want to change the Application Server URL, then you need to click on Change Application Server URL available in the ribbon.
PaperSave also gives you the ability to create a customized toolbar that could contain a set of commands that are independent of the tab on the Ribbon that is currently displayed. You can add or remove the buttons to the Quick Access Toolbar. Click here to know more.
 |
| Click on image to magnify/shrink |
2. PaperSave Application Server URL window will open as displayed below. Enter the Application Server URL of the server from where you want to import the configurations and click on Connect button.

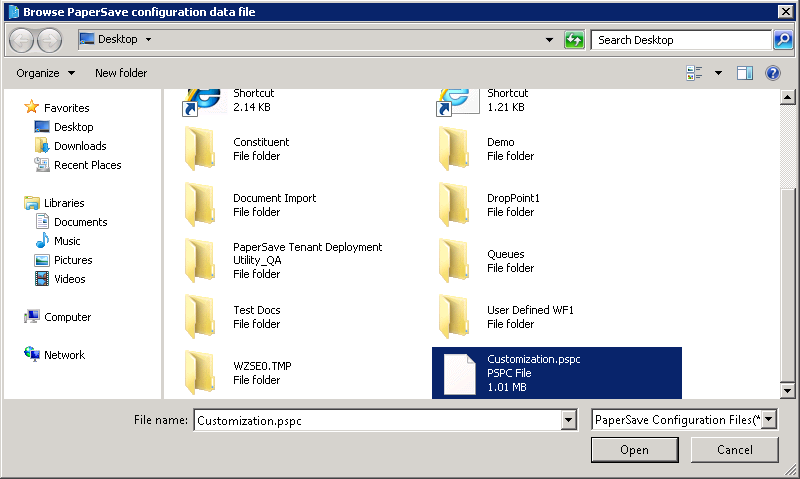
3. Click on Open Import File available in the ribbon to import the configuration file. Browse PaperSave Configuration Data File window will open as below. Select the customization.PSPC file to be imported from the appropriate location and click on Open button.
4. The list of PaperSave host applications along with the configuration of the various entities will appear in a tree view as shown below. In the ribbon, you will see an option to replace a specific term with another term in the file being imported. You can enter the term to be searched in the Search box and enter the term to replace the searched term in the Replace text-box.
Note: |
Please take a note that, Search and Replace text-box will get disabled, once you select the value from right panel. |
However, if you want to replace multiple terms then you will have to select the node from the left panel for which you want to replace the term. Thereafter, you can manually select the values from the right panel of the window and replace it with the desired text.
 |
| Click on image to magnify/shrink |
5. To override the existing configuration with the imported configuration, you will have to click on Override Existing Values button available in the ribbon, before processing the configuration.
Note: |
If Override Existing Values is not selected before processing the configuration, then the imported configuration will be appended to the existing configuration. In this case, values for only those configurations will get added for which no values have been defined provided the file which is to be imported contains values for those configurations. |
Once all the necessary changes are done to the configuration file, select the appropriate check boxes whose configurations needs to be imported and then click on Process Import button to start the importing process.
 |
| Click on image to magnify/shrink |