|
ScriptActivity |
  
|
| Show/Hide Hidden Text |
|
ScriptActivity |
|
| Show/Hide Hidden Text |
This activity allows you to use JavaScript to execute a specific function. For example, there might be a scenario where logic work has to be completed before checking a condition or taking an action. In a sorting Workflow, there might be conditions which are met to determine the correct Queue into which an item should be moved. Instead of having to use specifically defined (and static) IfElse conditions for each department, you could input a Script Activity to determine where to sort the item based on metadata entered in the Profile Fields. This function could also be used to change the value of a Profile Field, i.e., automatically assign an account number for a department. Anything that can be written in Java, i.e. looking up a value from a database, can be used here.
To use a ScriptActivity:
1. To create a State Activity drag an appropriate activity into the design area, then drag and drop the ScriptActivity under an event after which you want ScriptActivity as shown below:
 |
| Click on image to magnify/shrink |
2. The Properties of ScriptActivity will appear as shown below:
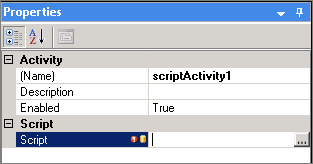
3. Click on ![]() in the Script box. The Please enter script window will open.
in the Script box. The Please enter script window will open.
 |
| Click on image to magnify/shrink |
You need to enter the server side JavaScript you want to execute within this workflow activity. You can use PaperSave Profile Fields by using the \"profile\" object followed by a \".\" and the field name (use \"_\" for spaces if profile field has spaces).
Example: profile.Invoice_Amount (for a profile field called \"Invoice Amount\").
You can add your own variables using the \"Globals\" object. Use Globals.add(\"Global Value Name\",\"Global Value\"). You can access Global values set in this Script Activity or preceding Script Activities by using the following syntax Globals[\"Global Value Name\"]. Remember that all object names are case sensitive. You can test the script by providing test values in the Profile Input section on the left and then by clicking on the Test Script button. Output profile values will be displayed in the Profile Output section on the right. You can view the output XML by clicking on the View Output button. Click here to get the list of PaperSave Variables that can be used while executing script.
PaperSave 5.2 provides you the facility to fetch the value from the columns of the Table Type Profile Field by below mentioned Syntax:
profile.TableTypeFieldName[RowIndex].ColumnName
In the above Syntax,
| • | TableTypeProfileFieldName stands for the named of the table type profile field. |
| • | RowIndex stands for the index of the row of the table for which you want to fetch the value. |
| • | ColumnName stands for the name of the column for which you want to get the value. |
Besides this PaperSave also provides you below mentioned 3 properties:
| 1. | profile.TableTypeFieldName.length: This property is used to get the length of the table type profile field. |
| 2. | profile.TableTypeFieldName.NextRowIndex: This property is used to get the value of next row index. |
| 3. | profile.TableTypeFieldName.LastRowIndex: This property is used to get the value of last row index. |
For more examples, click PaperSave JavaScript library functions.
4. Accessing Workflow Parameters:
PaperSave gives you the ability to access Workflow Parameters using ScriptActivity. Click here to know more about Workflow Parameters. Below is the syntax available for accessing Workflow Parameters using ScriptActivity:
Note: |
With PaperSave 5.2.1, you will experience a more easy and convenient way of writing scripts in script editor window for various classes like Profile, Parameter, Globals etc. So this will ultimately reduce the human error caused during writing the scripts. Click here to know more about Javascript Intellisense. |
Parameters["Name of the parameter (eg: GLCreditAccount)"]
For your easy understanding, below is the example available for the usage of above syntax in Script Editor window.
if (Parameters["GLCreditAccount"] == 'xxx-xxxx-xx)
{
PaperSave.ShowMessage("Approve");
}
else
{
PaperSave.ShowMessage("Reject");
}
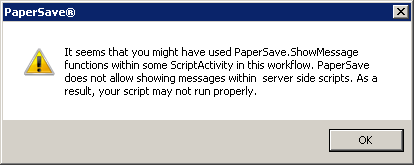
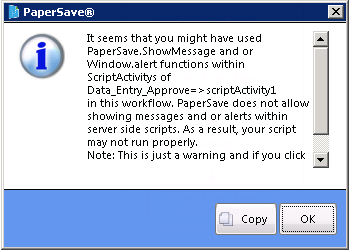
Note: |
||||
|
5. Generating Custom Error Message from Script Editor:
PaperSave 5.2 gives you the ability to generate custom error message by writing a script in script editor window in below given format:
throw new Error("<message text>")
You can write the script as given in below example:
try{
if(<condition if true>)
throw new Error(<"My Exception Message">);
}
catch(e)
{
throw (e.message);
}
6. Once you have written the script in Script Editor window, click on Test Script to evaluate the script. If the script will get successfully executed then you will be able to view below displayed message. Click on OK button to exit the screen.
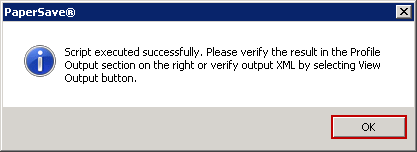
Thereafter you can view the output of the executed script by clicking on View Output button. As you click on View Output button, View Script Output Screen will open as displayed below.
 |
| Click on image to magnify/shrink |
7. You can even bind custom parameters by clicking on Set Values. Set Custom Parameters window opens. You can fill the details for the desired fields under respective column.
 |
| Click on image to magnify/shrink |
8. Provide the appropriate values for the desired settings and click Close.