|
Using Views |
  
|
| Show/Hide Hidden Text |
|
Using Views |
|
| Show/Hide Hidden Text |
VIEWS
You can modify the view of the table grid displayed below the Document Display section.
Note: |
Custom Action group under Options toolbar displayed in the below screen will be different for Workflow 2.0. Refer Options Tab Section for more details. |
 |
| Click on image to magnify/shrink |
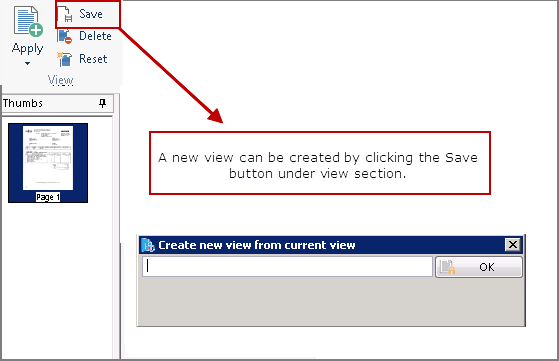
Save: A new view can be created by clicking the Save button.
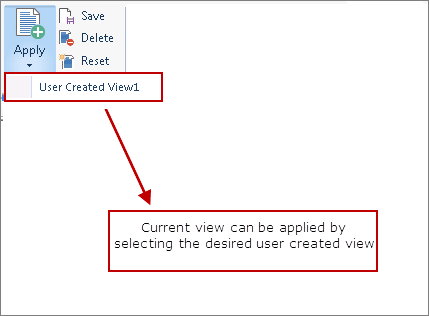
Apply: The created view is displayed by moving the mouse on the User Created Views listed in the Apply drop down list. A view can be applied by clicking on any desired view.
To delete a view, you need to click on the Delete button on the toolbar, the Custom Views dialog box will open. To delete the views you created, select the appropriate view and click the Delete button.
 |
| Click on image to magnify/shrink |
The applied view can be reset by clicking the Reset button.

The PaperSave Workflow (WE) window and Workflow Entry Viewer (WEV) window window can have different views for the same user. See displays below in order.
PaperSave Workflow Window:
 |
| Click on image to magnify/shrink |
Workflow Entry Viewer Window:
 |
| Click on image to magnify/shrink |
Note: |
Views created by a user cannot be viewed by other users in the PaperSave Workflow (WE) window and Workflow Entry Viewer (WEV) window window as the views are local for the user who has created them. |