|
Action & Navigation |
  
|
| Show/Hide Hidden Text |
|
Action & Navigation |
|
| Show/Hide Hidden Text |
Description of all the groups available under Action & Navigation tab is described below.
If the selected Workflow Type is 1.0, then you should see below displayed window:
 |
| Click on image to magnify/shrink |
If the selected Workflow Type is 2.0, then should see below displayed window:
 |
| Click on image to magnify/shrink |
Action Group:
1. Join Previous: This option is used to join the previous TIFF or PDF file with the current TIFF or PDF file. You can only join the TIFF or PDF files that appear in sequence in the grid.
2. Join Next: This option is used to join the next TIFF or PDF file with the current TIFF or PDF file. You can only join the TIFF or PDF files that appear in sequence in the grid.
3. Split Item: This option is used to split a TIFF or PDF file into two separate files. The new file will be created from the next page of the current page being displayed and will contain all the subsequent pages. You are allowed to split multiple page documents even after applying grouping.
4. Add Pages From Scanner: This option is used to add pages from the scanner to the current TIFF or PDF file.
5. Add Pages From File: This option is used to add pages from a file to the current TIFF or PDF file. Or, you can add a document to an existing page(s), and hence the selected document will show below the thumbnails of the existing page(s).
6. Replace Content: This option allows you to replace the content of the selected document by replacing the document with other document of same mime type. Clicking Replace Content button will open Windows Explorer form, asking you to select the file that you would like to replace with the existing file. Select the file from the desired location, click Open and you should see the document gets replaced with the one you selected.
Note: |
Replace Content will only replace the content of the document of the same mime type and Workflow Item details will remain the same. |
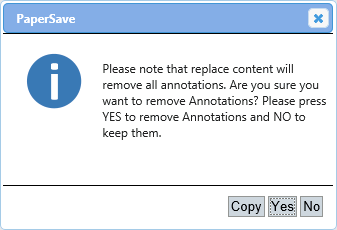
If the document that you are trying to replace has Annotations added within that document then you should see following message prompt asking you - "Are you sure you want to remove Annotations?". Clicking on Yes button, will not add those Annotations in the new document that you are about to replace. Clicking on No button will keep those Annotations in the new document that you are about to replace.
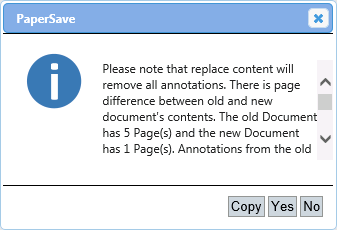
If there is a page difference between the old and new documents content, then you should see the following message displaying the related information and asking you - "Are you sure you want to remove Annotations?". The message box also shows you the page difference between the old and new documents content. Clicking on Yes button will NOT add those Annotations in the new document that you are about to replace. Clicking on No button will keep those Annotations in the new document that you are about to replace.
Note: |
Please take a note that Annotations will be carry forwarded to the new document based on the page # on which it exists. Incase the new document that you are about to replace has less no. of pages than the old document, then the Annotations will be removed from those pages that do not exists in the new document. |
7. Show Associated Documents: The option will show all the associated items. For example, when you click on this button, all the related items which are associated with a Host Record will be opened. If the selected Workflow Item is not associated to any Host Record, a message will be displayed.
Custom Action Group:
Options under Custom Action group will get varied based on the type of Workflow selected from Filters option under Home tab.
1. Set State: You will be able to view Set State if the selected Workflow type is Workflow 1.0. This option is used to change the state of a document. Select the document whose state is to be changed and select the appropriate state from the drop-down list and click on Go button.
2. Set Step: You will be able to view Set Step if the selected Workflow type is Workflow 2.0. This option is used to change the step of a document. Select the document whose step is to be changed and select the appropriate step from the drop-down list and click on Go button.
3. Move to Queue: You will be able to view Move to Queue option if the selected Workflow type is Workflow 1.0. This option is used to move a document from the current queue to another queue. Select the document to be moved and select the appropriate queue from the drop-down list and click on Go button.
4. Move to Workflow: You will be able to view Move to Workflow option if the selected Workflow type is Workflow 2.0. This option is used to move a document from the current workflow to another workflow. Select the document to be moved and select the appropriate workflow from the drop down list and click on Go button.
Version Control Group:
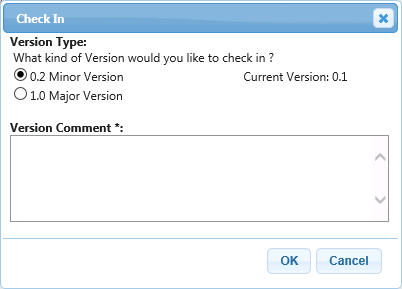
1. Check In: This option is used to save the changes made to the selected document. You can check-in only those documents that are checked-out or are checked-in for the first time after being added. Clicking Check In button will open below displayed window. You need to select version type with which you would like to check-in the selected document. Versioning the documents as minor or major would facilitate you to track the type of changes made to the document. Moreover, you can add the Version Comments in the available text-box for your reference. Then click OK to check-in the document.
You should see below successful notification once the document is checked in successfully.

2. Check Out: This option will check-out the selected document, which will enable you to make changes to the document. You need to check-out the document to make any changes. Clicking Check Out button will show you below displayed successful notification.

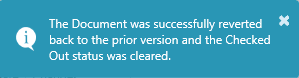
3. Undo Checkout: This option will undo all the changes made to the document after the latest check-out was made to the document and revert back to the prior version of the document. Clicking Undo Checkout button will show you below displayed successful message.
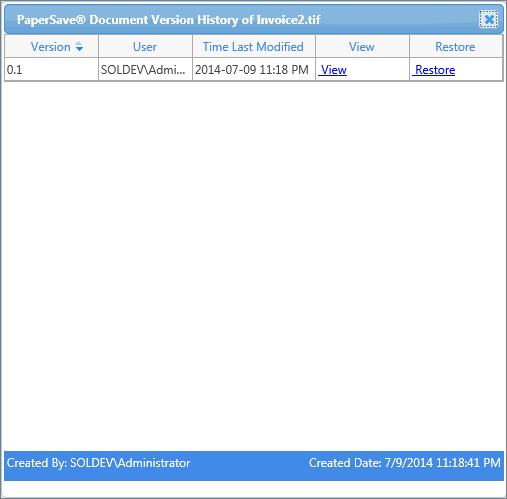
4. Show History: This option will display the history of check-in operations made to the selected document. You should see check in details like Version of the document, Name of the User who made the check in and Last modification time. You also have the ability to view the document by clicking View. You can click Restore, if you wish to revert back to the selected version of the document. System will take your confirmation before restoring the document.
Note: |
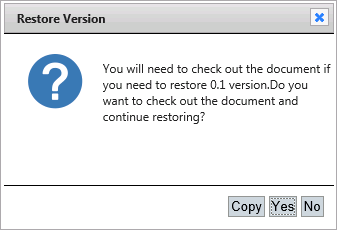
You need to make sure that the document which needs to be restored is checked out before you click Restore. Or else you will see below displayed message asking you to Check out the document. Click Yes to continue.
|