|
Creating Workflow |
  
|
| Show/Hide Hidden Text |
|
Creating Workflow |
|
| Show/Hide Hidden Text |
A PaperSave Workflow can be created either by using predefined templates or by creating a custom workflow using the various options provided.
Steps to create PaperSave Workflow:
1. Expand Workflows section from PaperSave Settings Form.
2. Click on Workflows. The Workflow section will open.
3. Select the Host Application (here, Student Information System), Module, Transaction Type, and Document Type for which the Workflow is to be created. Click on Add Workflow button available in the ribbon as displayed below.
 |
| Click on image to magnify/shrink |
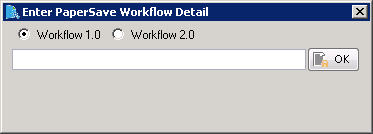
4. Enter PaperSave Workflow Detail window will open as displayed below. Select Workflow 1.0 option to create a Workflow of type 1.0 and enter the desired name of the Workflow in the available text-box. Then, click on Ok button to get directed to Workflow Designer form.
Note: |
||||
|
5. As you click on OK button, you will be directed to Workflow Designer form as displayed below. You have 2 ways to design a Workflow, viz; using pre-defined Workflow Templates or using different States & Activities available under Design Workflow Toolbox. You also have the ability to load a Workflow in the designer area using Load Workflow From File button. Click here to know more on Designing a Workflow.
Note: |
While editing an existing Workflow, you need to click Design Workflow option on the toolbar to open the Workflow in the design mode. |
 |
| Click on image to magnify/shrink |