|
Creating Workflow Queue |
  
|
| Show/Hide Hidden Text |
|
Creating Workflow Queue |
|
| Show/Hide Hidden Text |
To create a PaperSave Workflow Queue:
1. Click Workflows in the PaperSave Settings.
2. Click on the Workflows tab.
3. Select the Host Application (here, Student Information System), Module, Transaction Type, and Document Type for which you want to add a Workflow Queue.
4. Click Add Queue on the toolbar. The Workflow Queue Information section will be displayed at the bottom of the window.
 |
| Click on image to magnify/shrink |
Understanding Workflow Queue Information:
| □ | Name: Type the name of the Workflow Queue. |
| □ | Scan Location: This is the location for the ScanFirst directory where the documents will be placed for processing. If the Scan Location is not set, the documents must be placed in the default Watch Folder location. For instance, C:\Program Files\PaperSave\Watch Folders\Workflow. |
Note: |
Please take a note that Scan Location input field will NOT be available to PaperSaveCloud Users. |
| □ | Workflow: Select the Workflow to which you want to associate the Workflow Queue. Also set approvers for the selected Workflow. |
| □ | Separator Type: There are three Separator types that are described below. |
Note: |
The Separator Type is only applicable to PDF and TIFF type documents. |
| ► | Barcode Separator: When this option is selected you have to first print a Barcode coversheet then attach the coversheet at the beginning of the document to be inserted into the Workflow Queue, and add it using ScanFirst. Click here for more information on Printing Separator sheets. |
Note: |
All ScanLater documents, and ScanFirst Workflow that use Barcode Separators must be TIFF format only. |
| ► | ImagePageSeparator: When this option is selected, after adding a document using ScanFirst, a separate file is created for each page of the document in the Workflow Queue. |
| ► | FileBasedSeparator: When this option is selected then the Workflow Queue will process each document entry as a single entry in the Workflow Queue. |
| □ | Stack Size: You are allowed to enter value for Stack Size in the available text-box. When you would click Load Next Stack button from Workflow Entry Viewer window, then system should load the stack as per the value set from here. |
Note: |
||||
|
| □ | Keep Cover Page: This option is only enabled when the Separator Type is set to Barcode Separator. Selecting this option will use the barcode page as the cover page of the document, otherwise the barcode page will be rejected and the remaining pages of the document will be selected. |
| □ | Modify Barcode Format Expression: This option is only enabled when the Separator Type is set to Barcode Separator. This option allows you to set custom Barcode Format Expression for the Workflow Queue by modifying the default Barcode Format Expression. |
| □ | Page to Separate On: This option only gets enabled when the Separator Type is set to "ImagePageSeparator." This option will create a new file in the Workflow Queue after the number of pages specified in this field. |
| □ | New Barcode Format: |
Streamlining of PaperSave barcode formats is done to minimize their physical size. Currently the Barcode will print as:
1) PSV :- ScanLater
2) PSSF :- ScanFirst
3) PSVACC :- ReCapture
4) PSSSL :- ScanLater upload using PaperSave
Now it will print as follows:
1) A = PSV
2) B = PSSF
3) C = PSVACC
4) D = PSSSL
This Barcode express will recognize both old as well as new formats.
5. Configure the Queue Security.
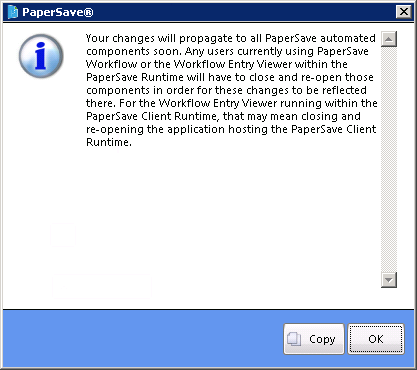
6. Click on Save Queue button on the toolbar to save the Queue. If the save operation was successfully completed, PaperSave will display the following message:
7. Now the newly added PaperSave Queue will appear in the grid.