|
Understanding Document Explorer Ribbon |
  
|
| Show/Hide Hidden Text |
|
Understanding Document Explorer Ribbon |
|
| Show/Hide Hidden Text |
The PaperSave Document Explorer ribbon provides various options for managing the documents of the records selected in the Host Application. The ribbon is divided into two tabs: Document Explorer and Options that consists of various groups and options within it. Description of all the options is as follows:
 |
| Click on image to magnify/shrink |
Document Operations Group:
1. Add Document(s): This option will allow you to add new documents to the record. Clicking on this option will open the Add New Document window.
2. Open Selected: This will open the selected document(s) in the Document Explorer grid.
3. Delete Selected: This option will delete the selected document(s) in the Document Explorer grid.
4. Show Associated Documents: This option will show all the associated documents of the selected record.
5. Regenerate CoverSheet: This option will regenerate a new barcode coversheet for the selected TIFF document.
6. Refresh: This option will refresh the list of documents displayed in the grid.
Reproduction Group:
1. Print: This option will print the document by selecting the check box or selecting the items from the grids.
2. Save: This option is used to save the selected document(s) on the local machine.
3. Email: This option is used to send the selected document(s) with an email as an attachment.
3.1. Email Link: This option will allow you to email the URL of the current window to the desired user.
Saved Views Group:
1. Apply: This option is used to apply a saved view.
2. Save: This option is used to save a view. A view is the grouping you have done by dragging the column header of the grid to display documents in the group. The changes in the grid, like change in the column size, filter, grouping and or sorting will also be saved.
3. Delete: This option is used to delete an already created view.
4. Reset: This option is used to reset if any views are applied to the current grid.
Version Control Group:
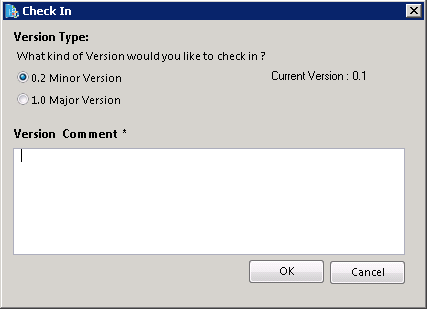
1. Check In: This option is used to save the changes made to the selected document. You can check-in only those documents that are checked-out or are checked-in for the first time after being added. Clicking Check In button will open below displayed window. You need to select version type with which you would like to check-in the selected document. Versioning the documents as minor or major would facilitate you to track the type of changes made to the document. Moreover, you can add the Version Comments in the available text-box for your reference. Then click OK to check-in the document.
You should see below successful notification once the document is checked in successfully.

2. Check Out: This option will check-out the selected document, which will enable you to make changes to the document. You need to check-out the document to make any changes. Clicking Check Out button will show you below displayed successful notification.
3. Undo Checkout: This option will undo all the changes made to the document after the latest check-out was made to the document and revert back to the prior version of the document. Clicking Undo Checkout button will show you below displayed successful notification.
4. Show History: This option will display the history of check-in operations made to the selected document. You should see check in details like Version of the document, Name of the User who made the check in and Last modification time. You also have the ability to view the document by clicking View. You can click Restore, if you wish to revert back to the selected version of the document. System will take your confirmation before restoring the document.
Note: |
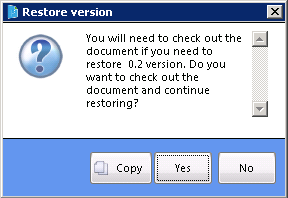
You need to make sure that the document which needs to be restored is checked out before you click Restore. Or else you will see below displayed message asking you to Check out the document. Click Yes to continue.
|
 |
| Click on image to magnify/shrink |
Options Tab:
Description of all the groups available under Options tab is mentioned below:
 |
| Click on image to magnify/shrink |
Print Options Group:
1. Reproduction with Annotations: When this option is selected, it will reproduce the selected file with annotations.
Note: |
Please make sure that you open the PDF document saved with annotations in Acrobat Reader Viewer to view the annotations and not in Windows 8 PDF Viewer. |
2. Reproduce Continuous Tiff as Single Tiff File: This option is used to print sequential TIFF files in the grid as a continuous TIFF file.
Document Action Group:
1. Update Document Metadata: This option will facilitate you to update one or more Profile Field values for multiple selected documents at the same time. Click here to know more.
2. Copy Link: This option will allow you to copy the URL of the current window. Main purpose of this option is to facilitate you to copy the URL and save it at your desired location. In future, whenever you wish to add the document to the same record, you can browse that particular URL and directly add the documents without opening the Host Application.
Grid Options Group: Click here for details
1. Show/Hide Filters: This option will Show/Hide the filters for each column on the top of the document list in the grid.
 |
| Click on image to magnify/shrink |
2. Show/Hide Grouping: This option will display the grouping bar on the top of the grid. You can group columns by dragging the header of the column to this bar.
Note: |
Show Groupings filter will only work when the selected Page Size is either ALL or if the number of Workflow Items in the grid is less than the currently selected Page Size. |
 |
| Click on image to magnify/shrink |
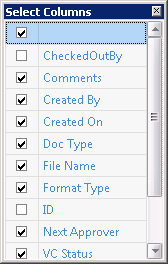
3. Set Columns: This option is used to Show/Hide the columns to be displayed in the grid. You can show the column by selecting the appropriate check box of the column in the Set Columns dialog box. Similarly, to hide the column, uncheck the appropriate check box of the column in the Set Columns dialog box.
Export Group:
Export: This option allows you to export the document list displayed in the grid to an excel file. Moreover, you will also have the ability to open the document using the hyperlinks available for each document in the excel file.