|
PaperSave Printer |
  
|
| Show/Hide Hidden Text |
|
PaperSave Printer |
|
| Show/Hide Hidden Text |
Users can now print any document to PaperSave and associate that document with a host application record or create the document within a PaperSave standalone Document Type. Printed documents can also be added as Workflow Items. When the PaperSave Printer is installed, a new printer will be added to the Devices and Printers section of Windows. The PaperSave Printer will convert any printed document into a searchable PDF before it displays the same form used within External Saving to specify the action to take with the document once it is created.
Note: |
||||||||||||
|
How to add documents to PaperSave using PaperSave Printer:
You need to follow below mentioned steps to add a document to PaperSave using PaperSave Printer:
1. Firstly, you need to open a document that you want to print using PaperSave Printer.
2. Then go to "File" Menu>> Select "Print" option. Or you can use shortcut CTRL+P.
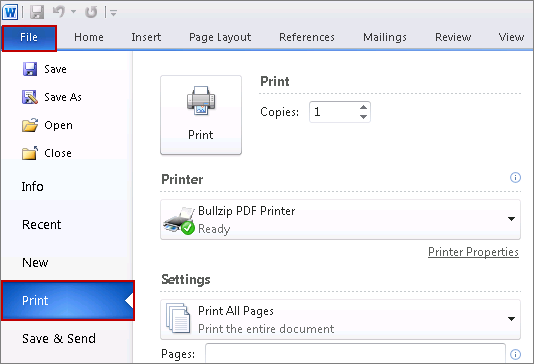
3. As you expand the drop down list under Printer, you will be able to view PaperSave Printer option. Select PaperSave Printer option and then click on Print button.
 |
| Click on image to magnify/shrink |
4. As soon as you click on Print option, system will start converting the document into searchable PDF and after few seconds Choose the Record to Associate to window will open as displayed below. From here the steps that need to be followed are same as File Management (External Saving). Click here to get more details on File Management (External Saving).
 |
| Click on image to magnify/shrink |