|
Table Type Field |
  
|
| Show/Hide Hidden Text |
|
Table Type Field |
|
| Show/Hide Hidden Text |
Table Type Profile Field allows you to set the Profile Field in a table format. You have the ability to define number of rows and columns in the table and specify what values should be listed in rows and columns.
To create a Table Type Profile Field, follow below given steps:
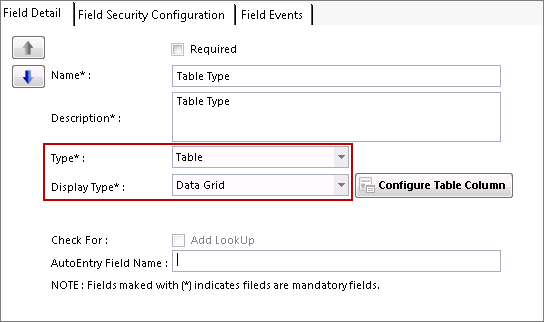
1. You need to select Type as Table.
2. Display Type will be automatically selected as Data Grid as displayed below.
3. Now click Configure Table Column button to configure the rows and columns in the table.
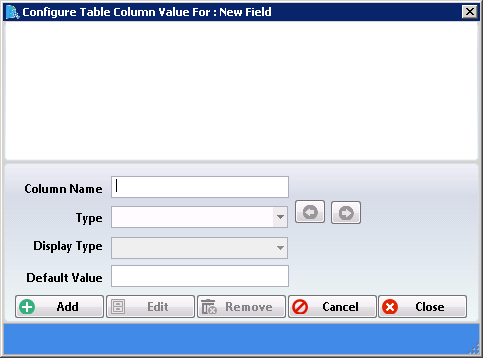
4. Configure Table Column Value window will open. Provide the input values as described below:
| • | Column Name: Enter the name of the column as per your desire. |
Note:
| • | Column Name should not contain a value with Apostrophe, as it is a restricted value. |
| • | Type: Select the type as either Date, Number or String. |
| • | Date: Selecting Date Type will give you the ability view Calendar and select appropriate date. |
| • | Number: Selecting Number Type will give the ability to enter the numeric value. You will be able to view Add Lookup button if Number Type is selected. |
| • | String: Selecting String Type will will give you the ability to select Display Type as Text Box or Drop Down List. |
| ► | Text Box: This gives you the ability to single line in the text box. For Text Box Display Type, you can add lookup values by clicking Add Lookup. |
| ► | Drop Down List: This gives you the ability to select only one value from the list. For Drop Down List Display Type, you can add list items by clicking Add Item List. |
| • | Display Type: Options under Display Type list will vary based on the selected Column Type. |
| • | Default Value: You can enter the default value for the selected Column Type. |
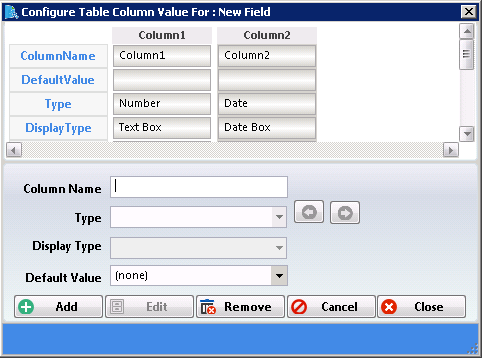
5. After providing necessary inputs, click Add to add the Column Value in the upper panel of the screen as displayed below. Click Edit to edit the selected column. Click Remove to remove the selected Column. Click Cancel to exit without saving the table column. Click Close to save and exit the window.