|
Understanding Search Toolbar |
  
|
| Show/Hide Hidden Text |
|
Understanding Search Toolbar |
|
| Show/Hide Hidden Text |
The Document Search toolbar provides various options to open the selected documents, delete selected documents, print, save, email, and much more. All the options provided in the toolbar under respective groups are discussed below.
 |
| Click on image to magnify/shrink |
Search Tab
Document Operations Group:
1. Delete Selected: This option will delete the selected document(s) in the Document Explorer grid. (This button will be enabled only if you have the required Security Rights.)
2. Open Selected: This will open the selected document(s) in the Document Explorer grid. (This button will be enabled only if the current user has required Security Rights.)
3. Refresh: This option will refresh the list of documents displayed depending on the changes made to the search criteria.
Reproduction Group:
1. Print: This option will print the selected document.
Note: |
You will be asked to install PaperSave Print Helper if you are using Print functionality for the first time from PaperSave Web Client. |
2. Save: This option will save the selected document on the local machine.
3. Email: This option is used to send the selected document(s) with an email as an attachment.
3.1. Email Link: This option will allow you to email the URL of the current window to the desired user.
Note: |
You will be asked to install PaperSave Email Helper if you are using Email functionality for the first time from PaperSave Web Client. |
Options Tab
 |
| Click on image to magnify/shrink |
Grid Options Group:
1. Show Filters: This option will Show/Hide the filters for each column on the top of the document list in the grid.
2. Show Groupings: This option will display the grouping bar on the top of the grid. You can group columns by dragging the header of the column to this bar.
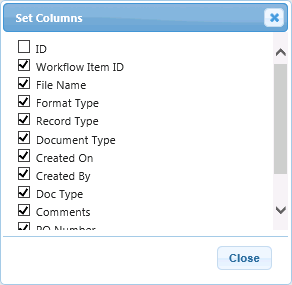
3. Set Columns: This option is used to choose which columns will be displayed. Clicking this option will display the Select Columns dialog box and you can select the check box of the corresponding column to be displayed.
Export Group:
Export: This option allows you to export the document list displayed in the grid to an excel file in .xlsx format only.
Print Options Group:
Reproduce with Annotations: When this option is selected, it will reproduce the selected file with annotations.
Company to Search Against Group:
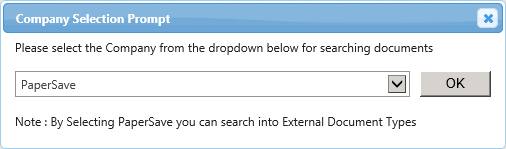
Change: This option will allow you to select the Company from the drop-down list. As you will click Change button, Company Selection Prompt window will open as displayed below. Expand the drop-down list to view the list of company names with their respective host application names. Choose the appropriate option and click OK.
Search Options Group:
1. Include Non-Associated Workflow Items: If this option is selected then even Non-Associated Workflow Items will be included in the search.
2. Include Completed Workflow Items: If this option is selected then only Completed Workflow Items will be included in the search.
Note: |
PaperSave will remember the preferences set for Include Non-Associated Workflow Items and Include Completed Workflow Items options and so you need not select or deselect the checkbox again, next time when you open Search window. |